
Variety is the spice of life … and digital marketing?
Variety can certainly make a digital marketer’s life a little easier. When you’ve worked hard to create a perfect piece of content, you can help that content go the extra mile (and then some) by repurposing and recreating the content in a huge number of ways.
Is it easy? Well, I wanted to find out.
I took a favorite piece of content from our Buffer blog, “How Often Should You Be Posting to Social Media?” and I hacked together 21 variations and uses for the original story. Here’s exactly how I did it and exactly how you can do the same.
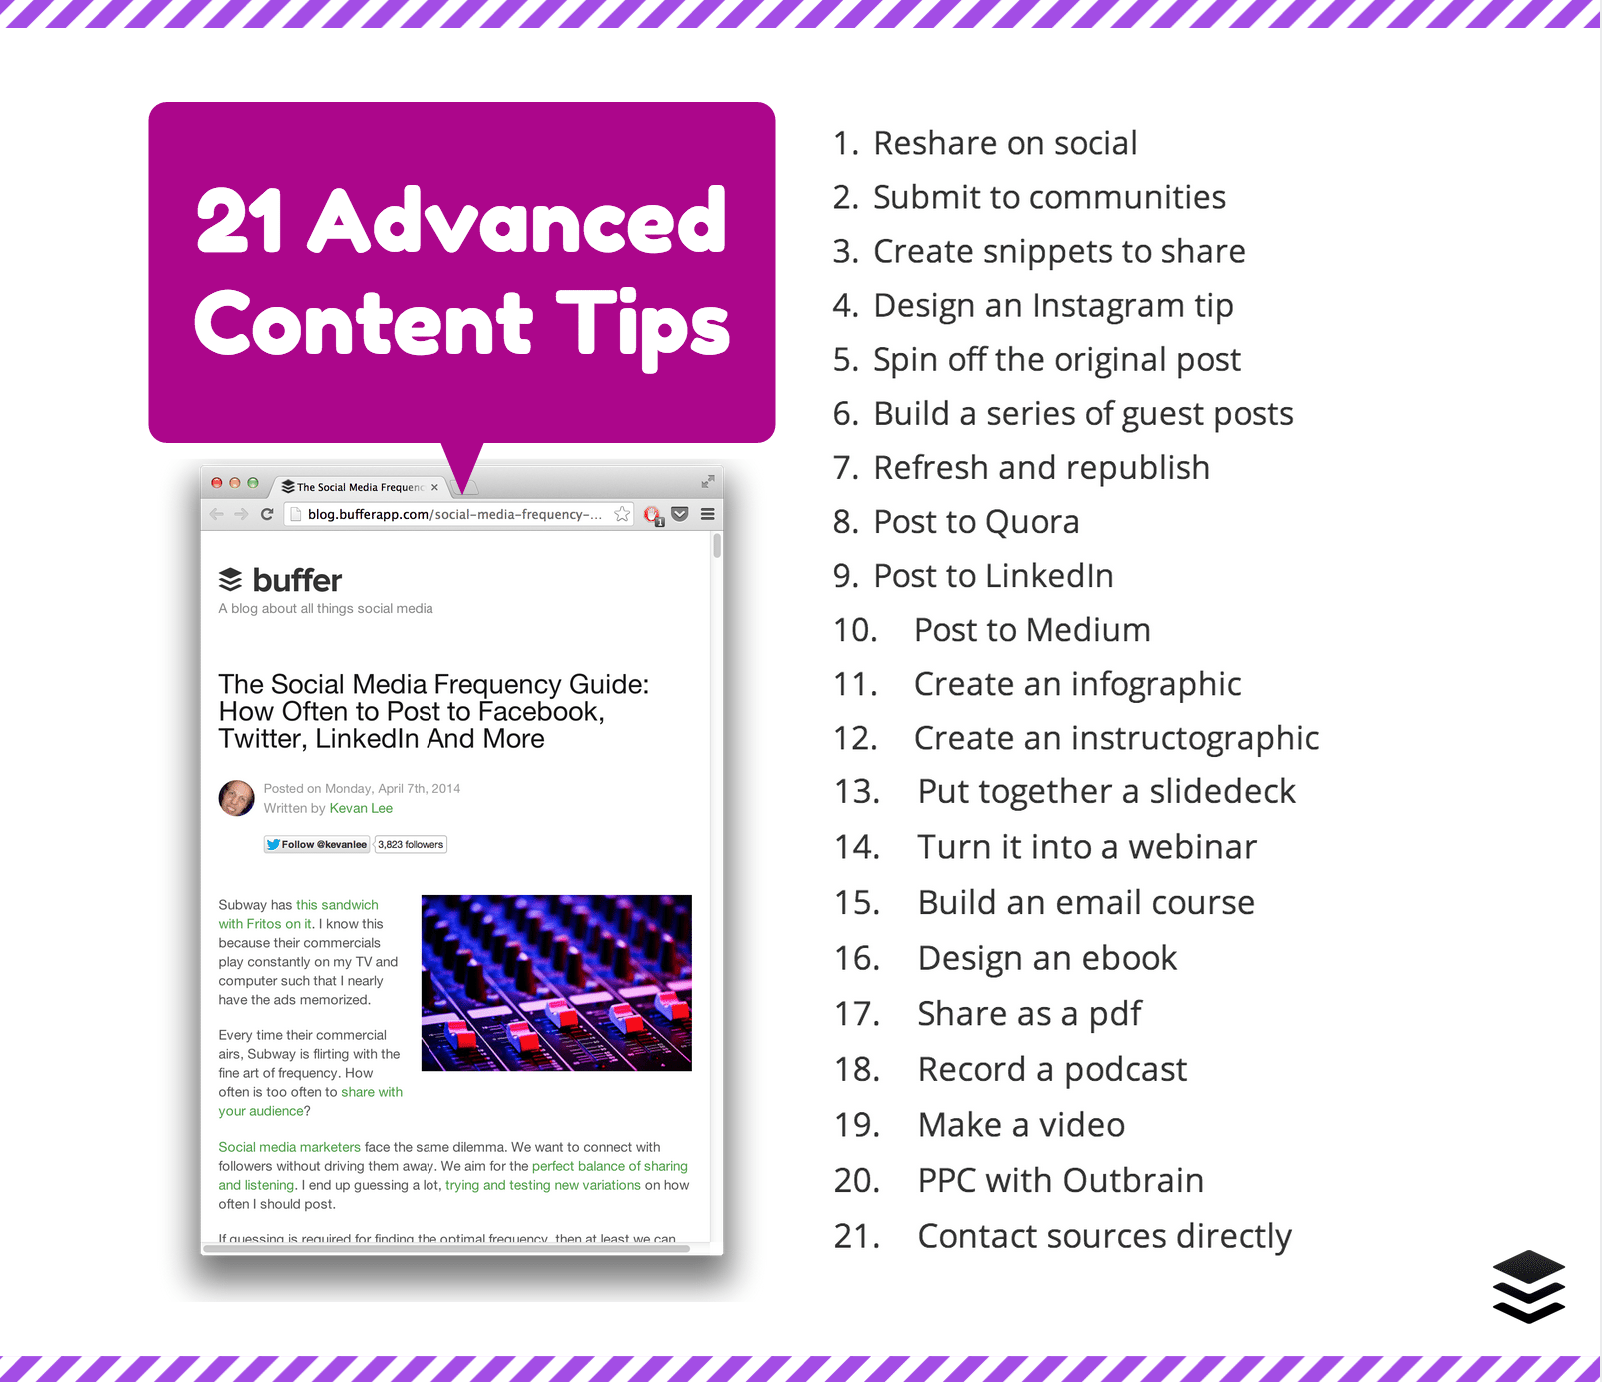
The rundown: All 21 advanced content tips to get more from your original content
Hitting “publish” isn’t the end of content creation. At least, it doesn’t have to be. There are so many different ways that your content can live on well after it originally lands on the blog. Here are the 21 ways I’ll test and report in this blog post.
- Share to social media—again and again
- Submit to content communities
- Create 20+ snippets for easy sharing
- Design an Instagram tip
- Spin off the old blog post into a new one
- Build a series of guest posts
- Refresh and republish
- Post to Quora
- Post to LinkedIn
- Post to Medium
- Create an infographic
- Create an instructographic
- Put together a presentation for Slideshare
- Turn it into a webinar
- Build a daily email series or email course
- Design an ebook
- Share content as a pdf
- Record a podcast
- Make a video
- Take a unique PPC route with Outbrain
- Contact sources and influencers directly
1. Share to social media—again and again
Should you share the same post to your social networks more than once? Our data says absolutely! We first wrote about this concept back in November, and we continue to see the numbers support this strategy.
Take our post about Twitter Tips for Beginners, for example. The post originally published on March 17. When we most recently shared it on May 20—two months after it first went live—the tweet earned more than two times the retweets of the original and outperformed all previous tweets on the post, almost all of which outperformed the original themselves.


Reposting can be a super simple process, too. There are a handful of different ways to do it. I’d suggest applying whatever method you use for your normal social media sharing workflow. I tried the following three ways. Number three is my favorite.
- Share from Twitter or Facebook directly.
- Share from the blog post via a sharing browser extension.
- Share from your Buffer dashboard by clicking and dragging posts from your analytics into your social profile queues

Difficulty: Easy
Time investment: 2 minutes
2. Create 20+ snippets for easy sharing
A variation on reposting to social media is to share the original link along with a new tagline or snippet. We often test headlines in this way, running two or three variations of text on the day that a post gets published. As time goes on, you can continue to mine the original content by grabbing snippets from different sections of the post and sharing to social. Think in terms of quotables and stats.
You could even develop a timeline for your social sharing, like this one from KISSmetrics.
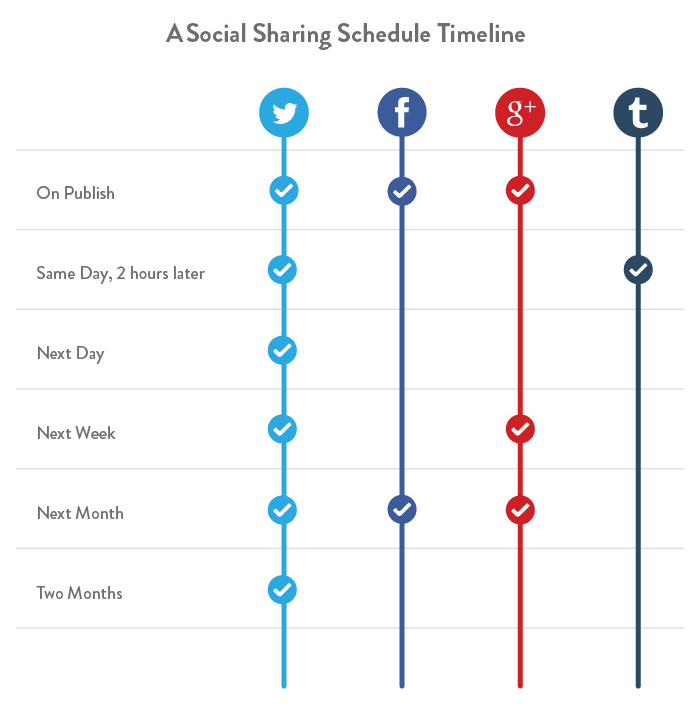
Coming up with 20 snippets from a single article might seem like a tall task (it really could be if you write 400-word blog posts or shorter). It gets a lot simpler when you break things down.
Start with subheads as snippets. Here are the ones from our How Often to Post to Social Media article:
- How to strike the balance between informative and annoying
- Learn how frequently Buffer shares to social media
- The optimal frequency for posting to social media
- How often you should post to Facebook
- How often you should post to Twitter
- How often you should post to Google+ and LinkedIn
- The incredibly short life cycle of a tweet
- The (relatively) long life cycle of a Facebook post
- How to schedule your posts when your audience is online
- What is the Late-night Infomercial Effect?
Next, dig out the stats.
- How and why we schedule 14 posts to Twitter each day
- Why we start tweeting at 3:00 a.m. CT
- Top brands average 1 post per day on Facebook
- Big Twitter engagement starts at 3 tweets per day
- If you want to wring the most value out of every tweet you send, tweet about 5 times each day
- Best practice for LinkedIn? 1 post per weekday
- It takes 18 minutes for a tweet to be over the hill
- Facebook posts reach their half-life at 90 minutes, nearly four times longer than Twitter
Finally, search for quotables. (We make this a little easier by bolding important, quotable bits inside the original story when we first write it.)
- The 3-step guide to frequency: Predict. Measure. Repeat.
- Publish as often as you have fresh, compelling content to share.
- When there’s little else being tweeted, your tweets are more likely to be noticed.
Voila! There’re 20+ snippets for sharing. Once you have your list, you can toss them into a shareable document for quick reference later, or you can schedule a batch to post over time.
Difficulty: Easy
Time: 10 minutes
3. Design an Instagram tip
One fun way to put these snippets to good use it to share them as Instagram tips. When sharing to Instagram, you’ll want to find a fantastic image to use as the backdrop. We’ve got a huge resource of free image sources you can peruse. Your best bet might be to find one that requires no attribution as it might be difficult to attribute properly when sharing on Instagram.

If you choose to build a photo on your desktop, you can use a number of third-party apps that send desktop photos to your iPhone’s camera roll.
Alternately, there are iPhone apps that let you design text images directly on your phone and upload to Instagram.
Difficulty: Easy, with the right app (try InstaQuote)
Time: 15 minutes
4. Submit to content communities
User-curated information channels can be huge opportunities for additional traffic. Think Digg in its heyday or Reddit today. Users share links, and the community votes for the favorites, allowing the best, most viral content to bubble to the top.
These content communities have made their way into specific niches. Hacker News is a great resource for technology/Silicon Valley enthusiasts. Growth Hackers caters to growth-oriented marketers. As a content creator, I find great value in the submissions at Inbound.org.
In fact, it might make sense to place the Social Media Frequency article on Inbound. To do so, click the blue Submit button on the homepage, then enter the details of the post.
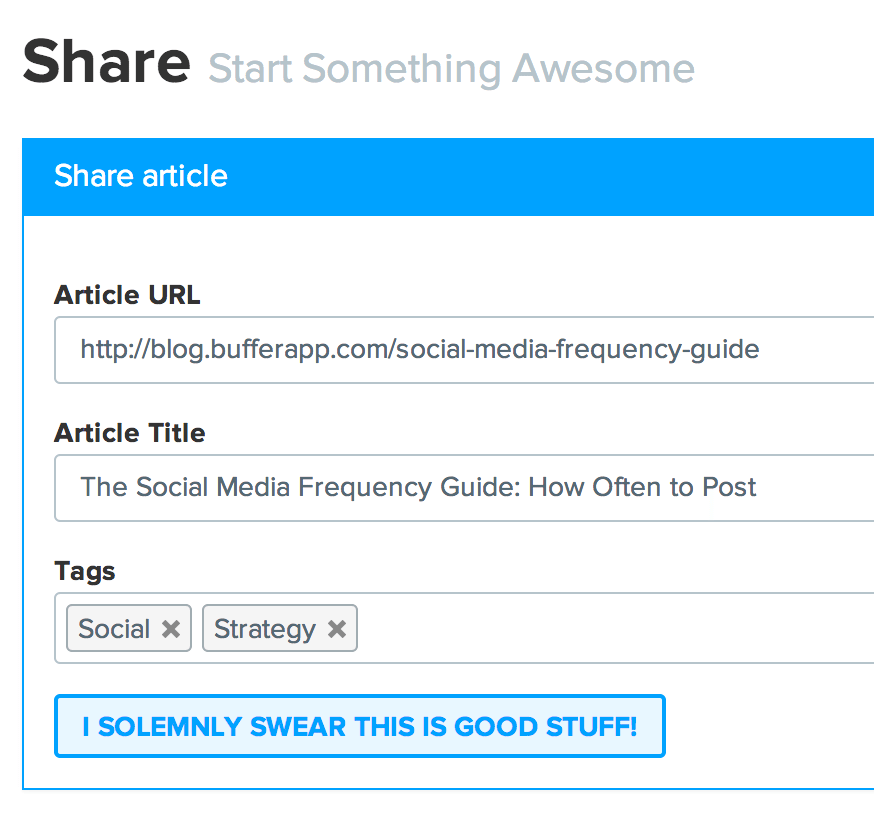
Notice the big, blue “I solemnly swear this is good stuff!” button? Most content communities have guidelines in place to ensure that submissions are of the utmost quality. Among Inbound’s publishing guidelines is to not only publish content from your own site. Content communities are not places to spam; they are places to engage. Keep this in mind when you’re submitting.
Difficulty: Easy, moderate (depending on how much community time you invest)
Time: 2 minutes to submit
5. Spin off the old blog post into a new one
Great content begets great content.
We learn a lot from successful posts that have proven their worth. The validity of a well-done post can and should spark ideas for new posts. If it worked before, copy it. This first step for a spinoff is to brainstorm variations and follow-ups to the original, excellent post.
Here are a few ideas for spinoffs of our original How Often to Post article.
- Social Media Frequency Put to the Test: The Data on Whether Frequency Standards Really Work
- Frequency vs. Consistency: Which Is More Important on Social Media
- The Drawbacks of Posting Too Much (Or Not Enough) to Social Media
- What Your Twitter Frequency Says About You: The Psychology of How Often You Post
- New Research on the Best Frequency to Post to Social Media
Of course, once you have your ideas, you’ll need to make time to craft idea into article. Some super-efficient writers like Belle Beth Cooper can create articles in four hours flat. It takes me a day or two. How fast can you create something new?
Difficulty: Easy to brainstorm, moderate to write
Time: 15 minutes to brainstorm, 2 days to write
6. Build a series of guest posts
You might think of guest posts as one-off articles about a new and different topic each time. Codeless Interactive has a suggestion: Try the Mix and Match Method.
Start by thinking of every post as a two-part recipe: Storytelling intro and Body. For each guest post, you can take the Body of one article on your own site, and create guest posts out of it by just changing the Story. This works extremely well because you already know the post will be successful before you give it to someone.There is a hint of syndication in this advice, and we’ve found syndication to be a great way to gain extra traffic to our blog and get more life out of a piece of original content. With the Mix and Match Method, you simply need to change around the story element of the post and keep the original body the same.
Here’s a new intro for our post about How Often to Share on Social.
Stop me if this sounds familiar. You find an amazing piece of content that you think would be huge for sharing with your followers, and as you hover your mouse over the share button, you pause. Wait, have I already shared too much today? Am I annoying or informing? What will people think of me?
I’ve been down that road before, which is how I ended up researching optimal frequency to post to each of the four major social media sites each day. Now I can share guilt-free or schedule ahead for the next day.
What are those golden sharing limits? Read on to find out.
Once you’ve got the new intro written, you can start pitching the post to new guest spots. When you’re hunting for places to post, see what sites fit your niche (tracking the domains on a community like Inbound.org is a good start) and notice which ones publish content from guest contributors (I like to keep an eye in my Feedly account for posts from guest authors).
Difficulty: Easy
Time: 15 minutes, once you have a good guest post rolodex
7. Refresh and republish
Hop in a time machine with me and go ahead six months. Will our original How Often to Post to Social Media article look a little long in the tooth?
Chances are that new research will have come out or a new social network will have popped up. Instead of abandoning the old post and its amazing content and long-standing SEO reputation, we can simply update it.
One way to do so is to add a note at the top that mentions where this post originated. Here’s an example:
Does this post look familiar? We originally published it in April 2014, and so much has happened since! It’s now updated with all the latest data and research on the topic. Enjoy!
Then dig into the content and add the bits and pieces that need a refresh. For the How Often to Post to Social Media article, we have since run some tests on the perfect amount to post to Google+. This data wasn’t in the original post, so we could add in a new section there and republish it down the road.
Difficulty: Easy
Time: 30 minutes
8. Post to Quora
Many social sites are building out content platforms. Quora was one of the leaders in this regard, letting its users add content to personal blogs on the networks. If you need inspiration for how to do this well, take a look at how Buffer guest author James Clear republishes his existing content to Quora.
You can take your original posts and republish them in their entirety or in snippets to Quora. Our Social Media Frequency post was long to begin with, so I grabbed just the last sections of the post to share on Quora.
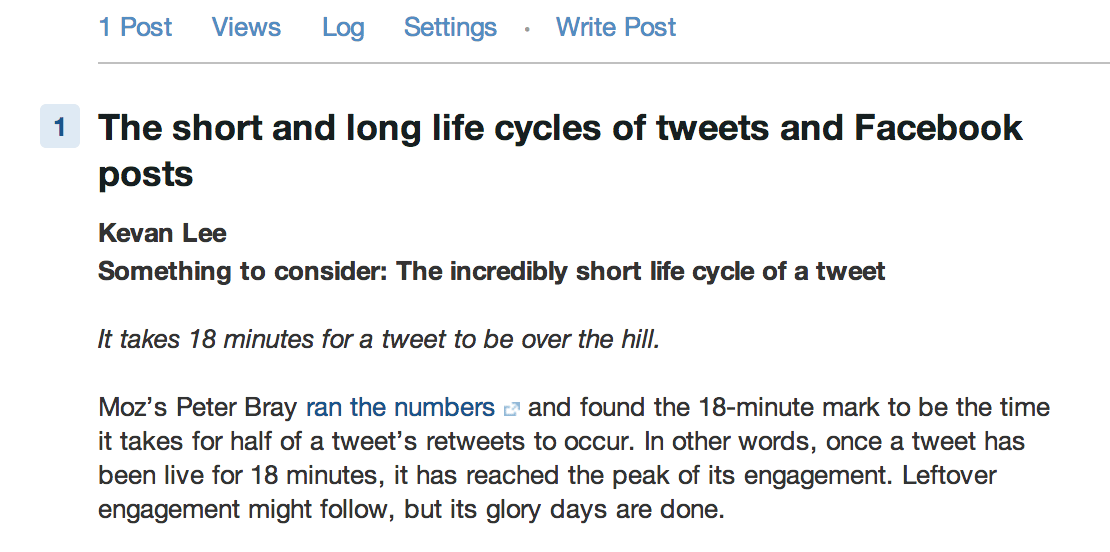
Start by clicking on the Write Post button from the drop-down menu in the top right corner. You can also create multiple blogs through Quora with unique domains (helpful for posts on a particular topic or category).
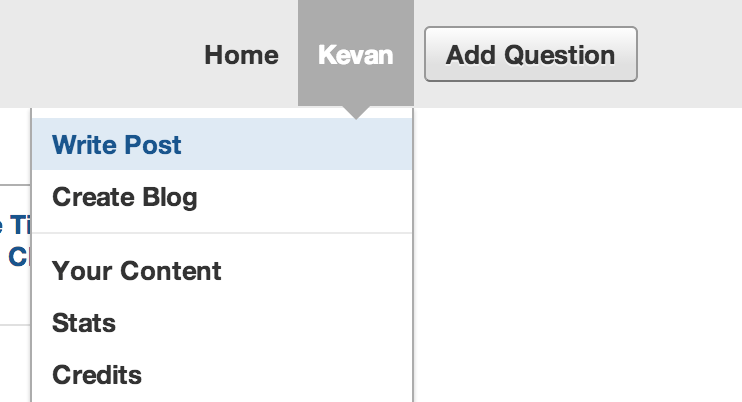
After clicking on “Write Post”, you’re taken to the post editor screen. Here, I simply pasted in the text from my original post and adjusted some of the line breaks and formatting. I re-uploaded the images that I wished to include and then hit publish.
And just like that, the post is live!
Difficulty: Easy
Time: 15 minutes
9. Post to LinkedIn
LinkedIn is also in the content-creating game. Their publishing platform is currently being rolled out to all users—tens of thousands of folks already have the feature, maybe even you. To test and see if you’re in yet, go to the LinkedIn homepage, and look in the “Share an update” box. If you have publishing powers, you’ll see a gray pencil next to the gray paperclip at the right of the update box.

Hovering over this pencil symbol will give you the option to “Create a post.” Then it’s as simple as copying and pasting from your original article right into the LinkedIn editor.
Difficulty: Easy
Time: 15 minutes
10. Post to Medium
Reposting to Medium works quite similar to Quora and LinkedIn; you can grab parts or the whole of your original article and publish to Medium.
To create a new post on Medium, click on the Medium icon in the top-left corner to expand a vertical menu. Click on “New Story” from this menu.
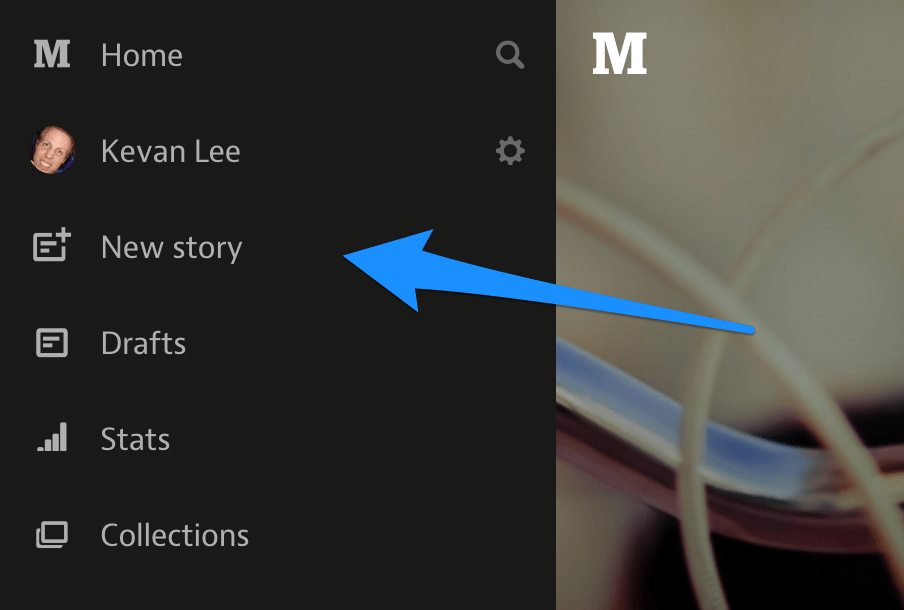
The post editor gives you space to write a new title, a new subhead, and the body of the story, plus you can place a main image that will appear as the background at the top of your published article.
Pasting and editing inside Medium is as easy as it is anywhere else. Within a couple minutes, you can have your post live on the site.
There are even a couple bonuses to publishing on Medium:
- Collections: You can group your posts (and others’) into themed collections that highlight social media tips or content tips or whatever else you might find helpful to collect.
- Suggest a link: At the bottom of every Medium post, you can suggest links for further reading. It’s a great opportunity to point readers back to your original article on your blog.

Difficulty: Easy
Time: 15 minutes
11. Create an infographic
What tends to get the most shares? Visual content. We’ve been eager to try including a visual element inside every post on the Buffer blog, and this often means getting out our design tools and creating infographics.
One of our favorite tools for doing so is Canva. The easy interface and premade templates make life easy on non-designers like me. To start with, grab the Blog Graphic template, which will give you a tall 800-pixel by 1,200-pixel image size.
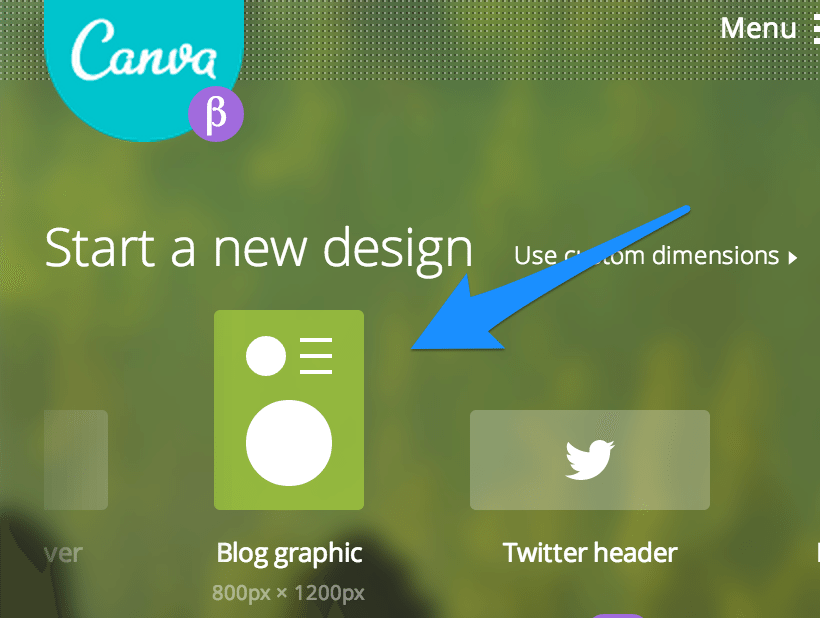
Inside the image editor, you can choose a layout template from the left menus. I was looking for something with easy-to-read typography and a place to drop an image. Here’s the one I chose:
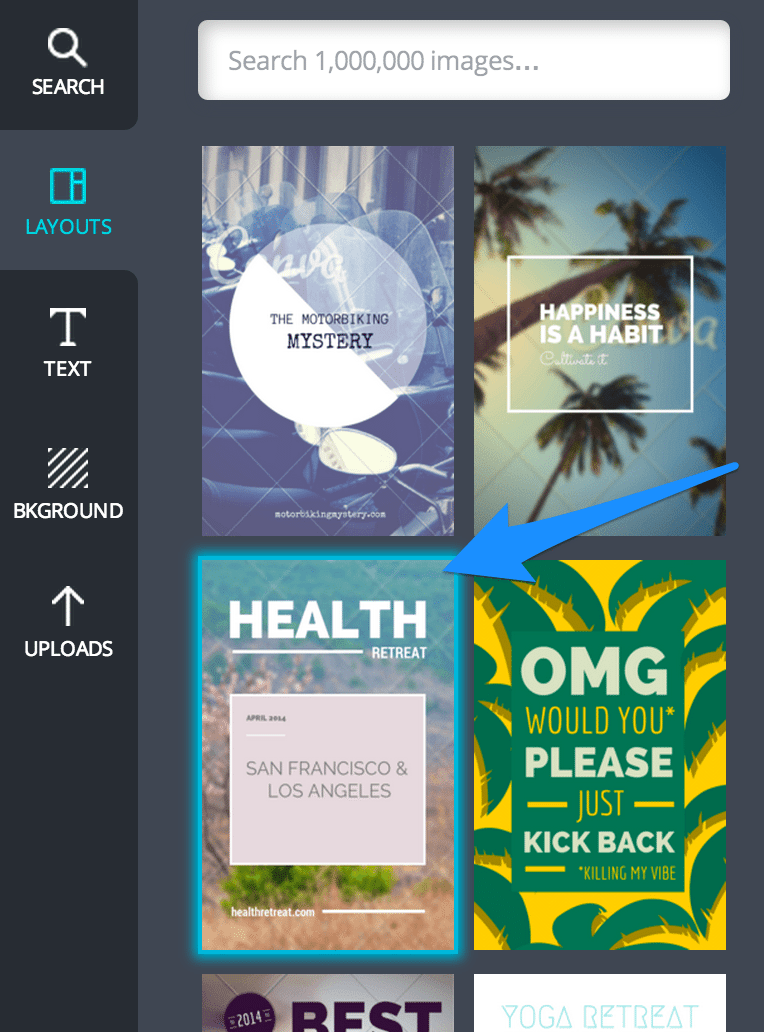
Canva lets you upload your own images into your designs, so I grabbed the featured image from the original post, uploaded it to Canva, and dragged it onto the background of the template.

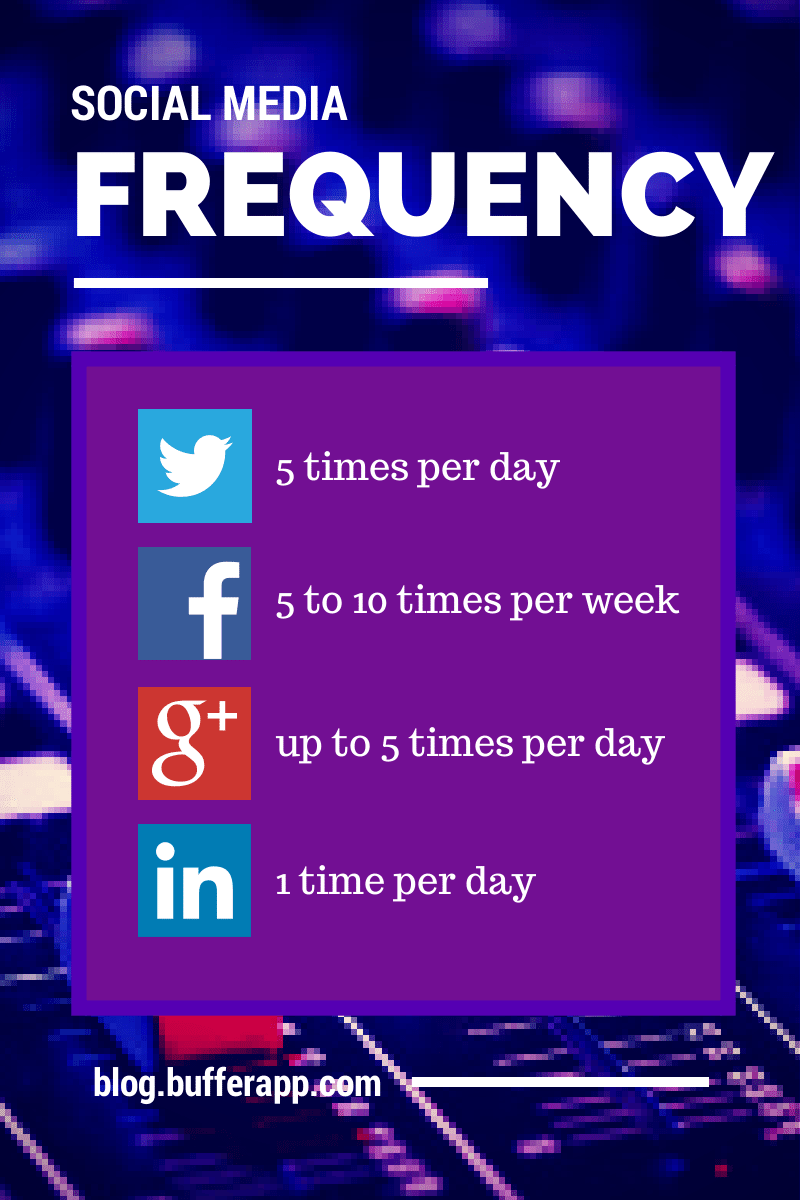
Since the original post was about social media frequency, I thought the infographic would be most helpful if it showed the frequency recommendations for Twitter, Facebook, Google+, and LinkedIn all at a glance. Canva includes logos for each of these social networks, so I searched and grabbed them from the Canva image library.

After that, I typed in the text I needed, rearranged everything along a grid (one of my favorite built-in features of Canva), and added a Buffer link to the bottom. Here’s the finished product:
Difficulty: Moderate to hard
Time: 30 minutes to 2 hours
12. Create an instructographic
Instructographics are in the same family as infographics, only they take on a descriptive tone rather than an informative one. Instructographics show you how to do something, using images and, well, instructions. These types of graphics are quite popular on Pinterest and other visual sharing sites.
The How Often to Post to Social Media article doesn’t really lend itself well to an instructographic, so I’ll leave a good example instead. If you have a blog with a lot of How To articles, instructographics might be a good way to go to make your content last longer.

Difficulty: Hard
Time: 30 minutes to 2 hours
13. Put together a presentation for Slideshare
Slide decks make great pieces of visual content for blog posts (see this example of a beautiful presentation embedded in a post at Copyblogger). When these decks are uploaded to Slideshare, they gain an extra opportunity for virality and sharing, too.
You can take an existing piece of content and spiff it up into a presentation, either designing in PowerPoint or a free cloud app like Presentations inside Google Drive. I used Presentations to put together this quick slidedeck for the Social Media Frequency post, grabbing the big-idea elements from the post and all the visuals I could get. Then I uploaded straight to SlideShare, which gave me the embedded presentation you see below as well as a bevy of social share options.
Difficulty: Moderate
Time: 30 minutes
14. Turn it into a webinar
If you’re feeling really ambitious, you can take the ideas from a blog post and expand on them in a webinar. You may find that you’ll need a handful of posts to provide enough content to fill 20 or 30 minutes of webinar time and to give enough breadth and depth on a topic. We did it this way with our Twitter Science webinar. Much of the research inside the webinar originated in blog posts. Courtney organized it all into a cohesive presentation (plus slide deck) and shared it in webinar form.
We’ve tried a couple different tools so far with our Buffer webinar experiments.
- Go2Meeting
- Google Hangouts on Air
So far, Hangouts seem to fit our needs a little better. We have the ability to show slides and answer questions, and the final product gets converted automatically into a YouTube video that we can share as a followup.
Bonus tip: The reverse works of content-as-webinar works, too. You can take a webinar and spin it into a blog post.
Difficulty: Hard
Time: Days or weeks to plan, prepare, promote, and perform
15. Build an email series or email course
Whether you’ve built a list of email subscribers or you’re looking to attract new emails to a list, existing content can provide great value to your readers.
Using existing content as an email series or email course looks a bit different from an RSS email campaign. With RSS, the posts get sent out right away. With an email course, people sign up to learn about a specific topic rather than receive an update every time you post to your blog.
If I were to make an email series based on the How Often to Post to Social Media article, I might tailor it to a broad “Ultimate Tips for Rocking Social Media.” Then I could pull in other existing content to support the series—things like timing and headlines and visuals.
To set up this course in an email program, create an Autoresponder, which sends emails automatically when certain criteria are met. In this case, the autoresponder will send when someone signs up and at regular intervals after sign up. Here’s how this might look in MailChimp.
Choose Autoresponder from the left menu.
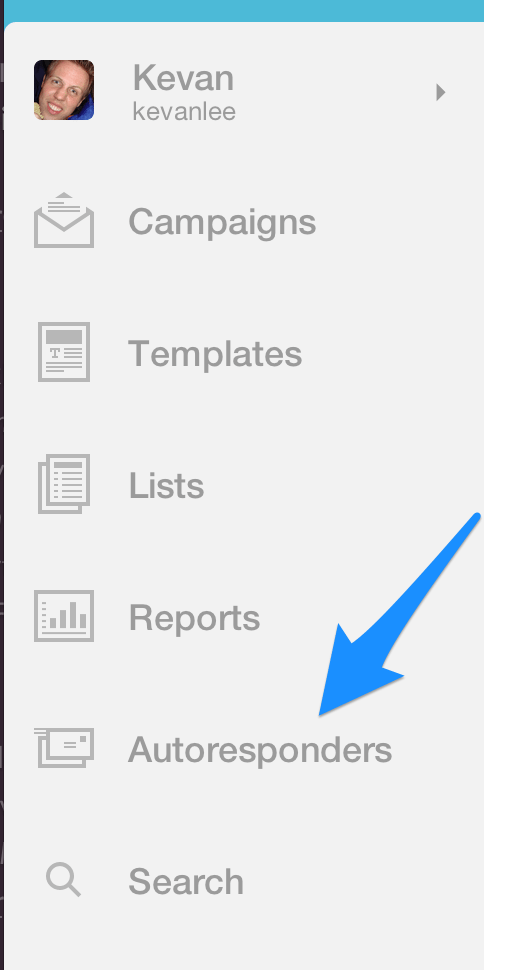
Then you can click to create a new autoresponder and choose the list that will be receiving these emails. After this, you’ll see the page of autoresponder settings where you can tweak the action that prompts the autoresponder (in my case: subscription to list), the timing of the email (send 1 hour, 1 day, or later after sign up), and the days when the email gets sent.
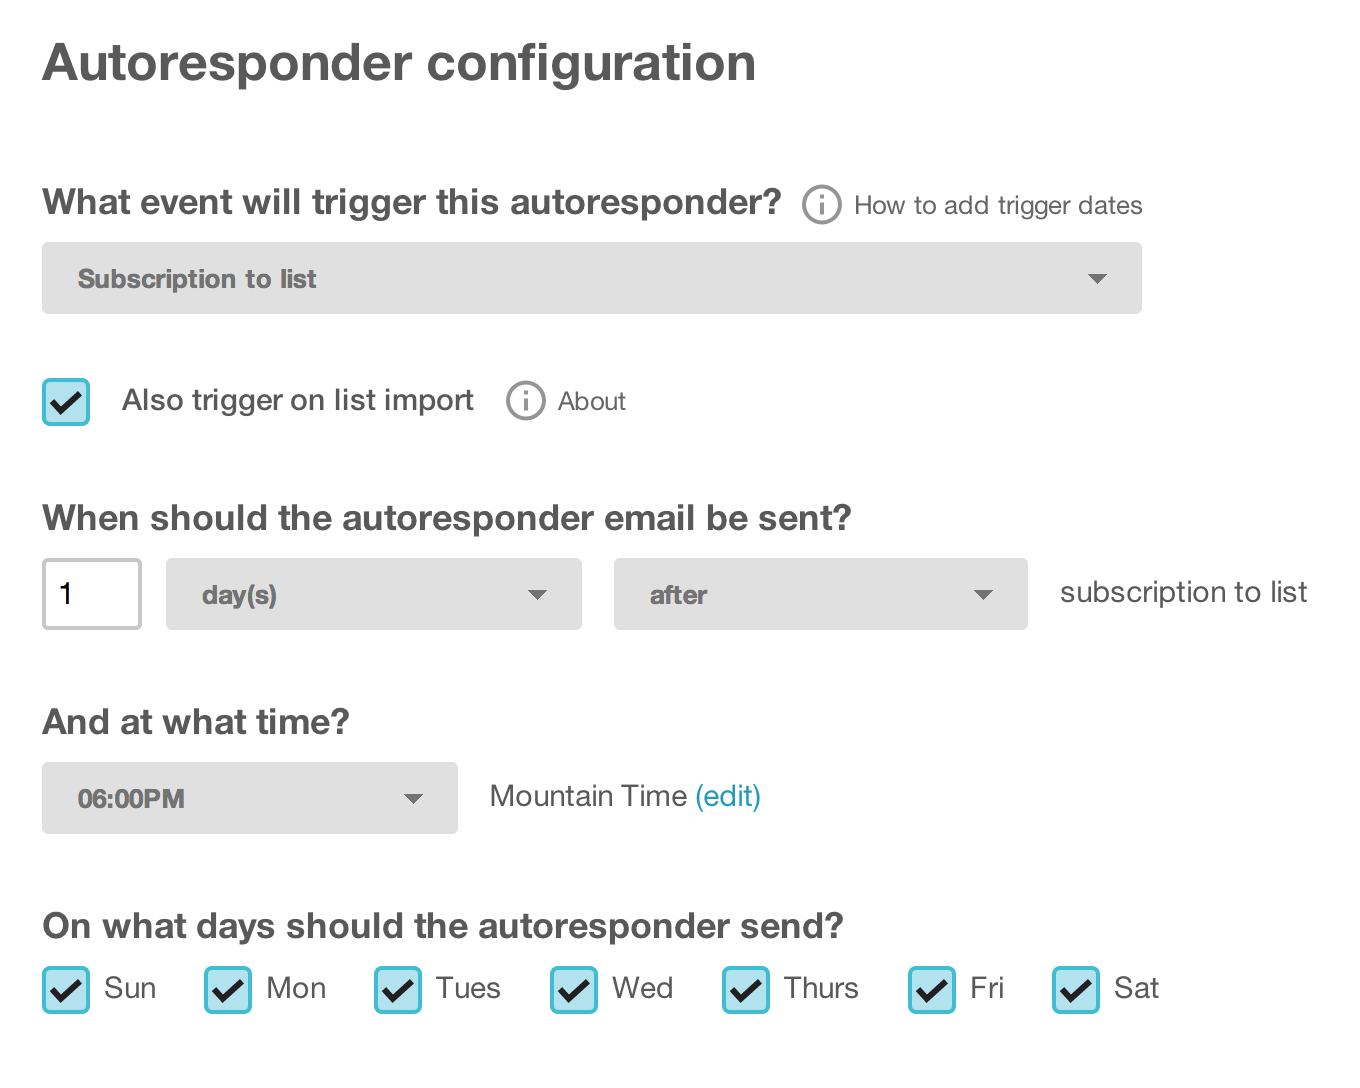
After these settings are in place, the rest of the process mirrors that of setting up a normal campaign. You can create the email yourself, and make it look however you want.

Difficulty: Hard
Time: 8 hours
16. Design an ebook
Ebooks are really helpful to have around—and kind of a lot of work to create. We have been in the midst of a Buffer ebook for quite some time now, and it seems the hardest part is carving out the hours to create. In the case of our How Often to Post to Social article, this could easily fit as a chapter in an ebook with a broader theme—an ebook of social media tips, perhaps.
Once the ebook is done, you can put it to great use as a resource for site visitors or as a giveaway for new signups to your email list. Help Scout has one of the finest ebook collections around, if you’re interested in inspiration.
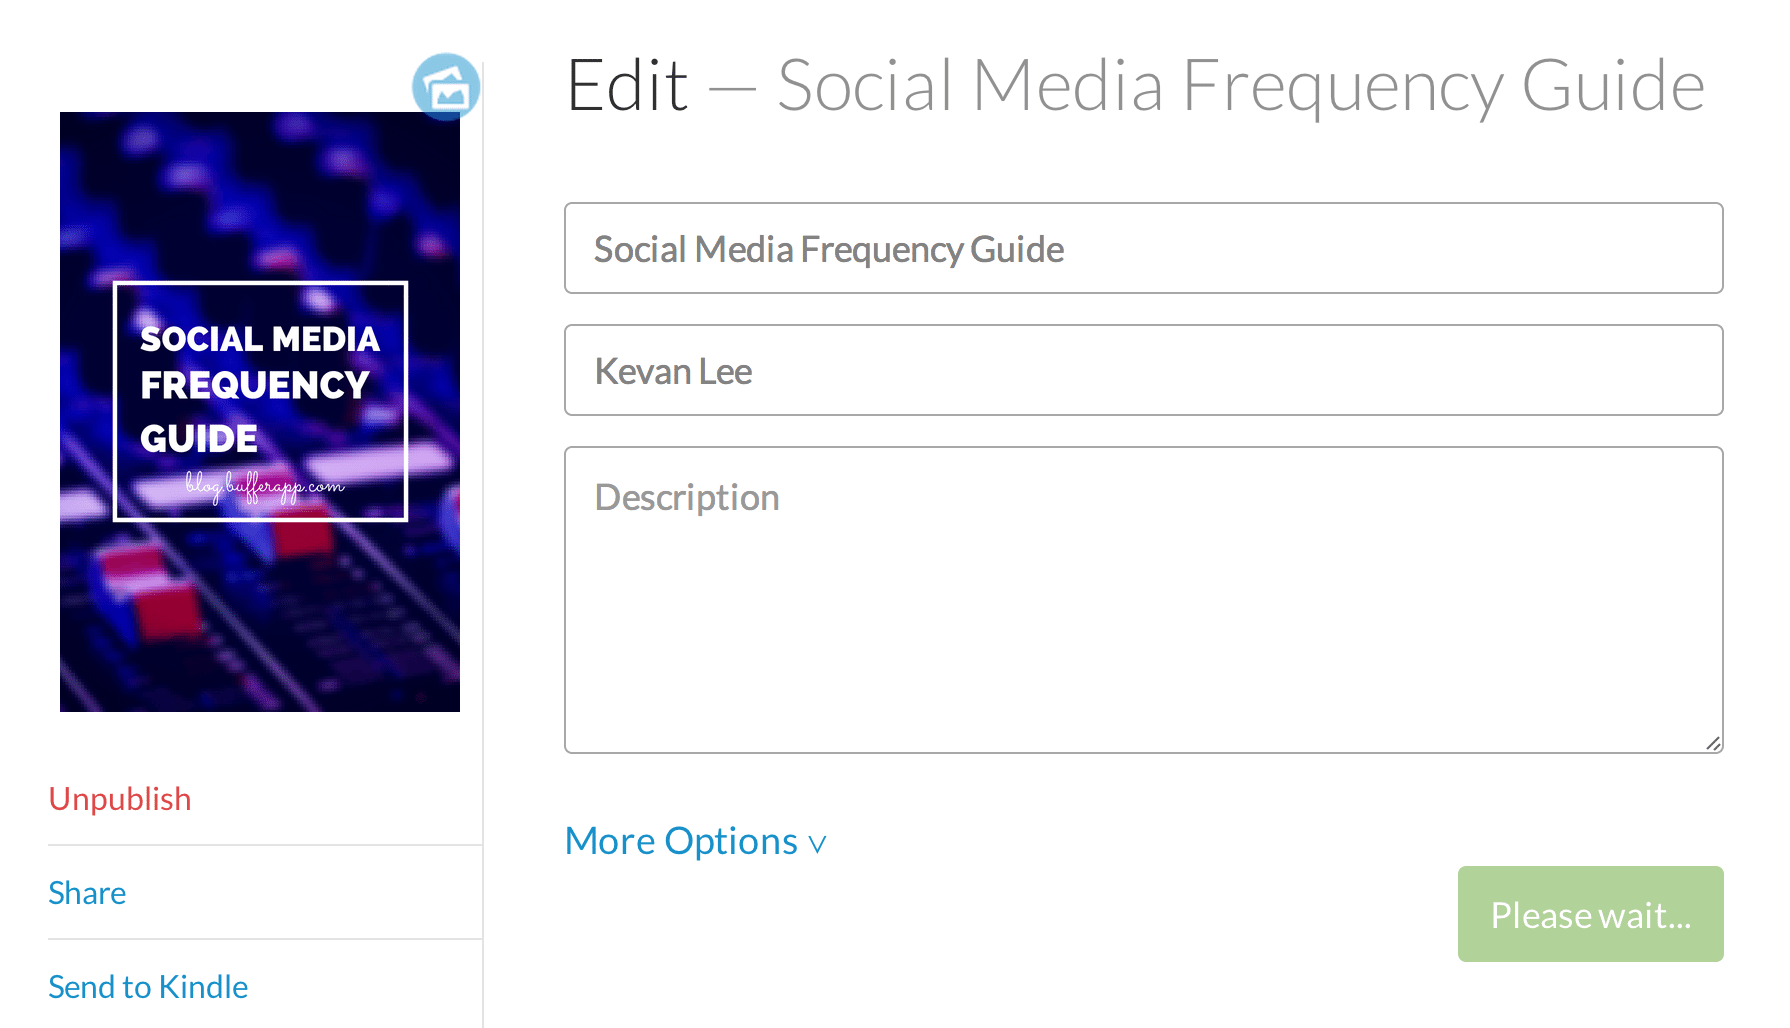
I tried my hand at a fun new ebook tool called Liber.io, which creates ePub files from your Google Docs. I copied and pasted the original How Often to Share article into a new Google Doc, synced up Liber.io, and let the app go to work. You can check out the final product here.
Difficulty: Hard
Time: Days for a full ebook, hours for a short one
17. Share content as a pdf
An alternative to a full-blown ebook is to create a pdf of your blog post. You can use pdfs to send out in emails, add to resource sections of your site, or even embed with a service like Scribd or ISSUU.
Once you copy and paste the original blog post into a program like Word or Google Docs, you can export your new creation as a pdf.
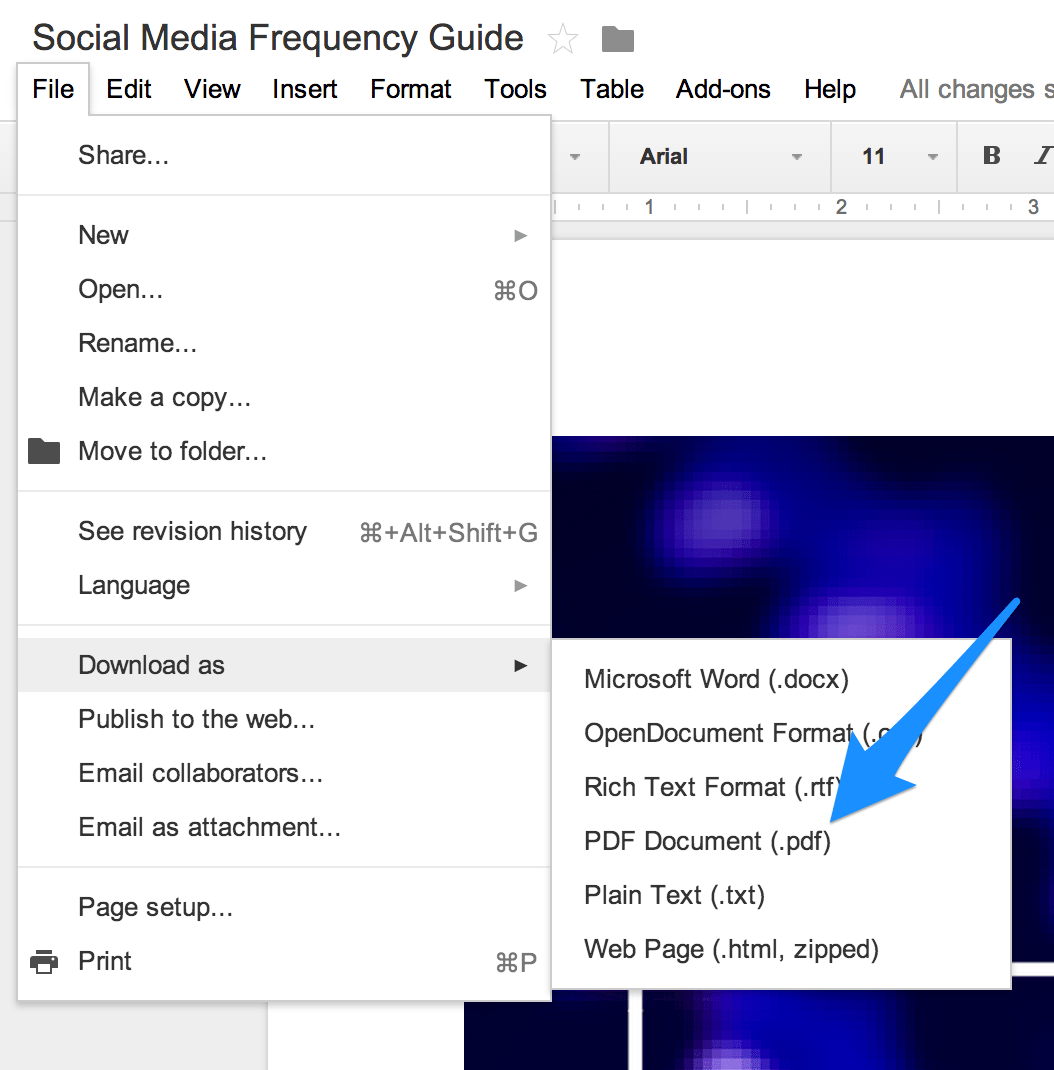
And after you’ve downloaded your file as a pdf, you can hop into Scribd or ISSUU and upload your document. Both sites provide you with embed codes after the file has been uploaded, so you can grab the code to easily add your pdf to your website. Here’s a look at how the Social Media Frequency post would appear (courtesy of ISSUU).
Difficulty: Moderate
Time: 30 minutes to 1 hour
18. Record a podcast
An article as audio? You bet! People learn in a huge number of different ways, and sometimes audio might be the best way to reach certain parts of your audience. Many high-powered bloggers are taking this route with content—e.g., Tim Ferriss is eight episodes in to a new podcast series.
There are lots of different paths to go with creating a podcast, and the amount of time it takes will depend on how much editing you choose to do. The super simple way to get your audio out there would be to use Soundcloud to record a reading of your blog post with some added storytelling or additional conversation to follow. Soundcloud provides a simple way to embed the audio into a post and to share the audio on social.
Difficulty: Hard
Time: 4 hours or more
19. Make a video
As with podcasts, restructuring your content into video could help introduce it to a new audience that might be more reachable through a new medium.
Powtoon offers free animated videos and presentations. You can go this route for a low-investment experiment. If you’re after something more substantial, there are some professional video makers who can make some really amazing things with your original content.
Once you’ve got the video created, you can upload it to YouTube, Vimeo, Wistia or any number of other video services, depending on how much control you want over the video experience).
For example, here’s a guest video by VideoFruit that takes some of the main points of our popular Twitter Tips for Beginners post and repurposes them for a video audience.
Difficulty: Hard
Time: 1 day
20. Take a unique PPC route with Outbrain
Are you familiar with Outbrain? Many sites use the story recommendation service in the footer of their blog posts to point out other interesting content around the web. Did you know you can pay to have your content appear in these Outbrain slots?

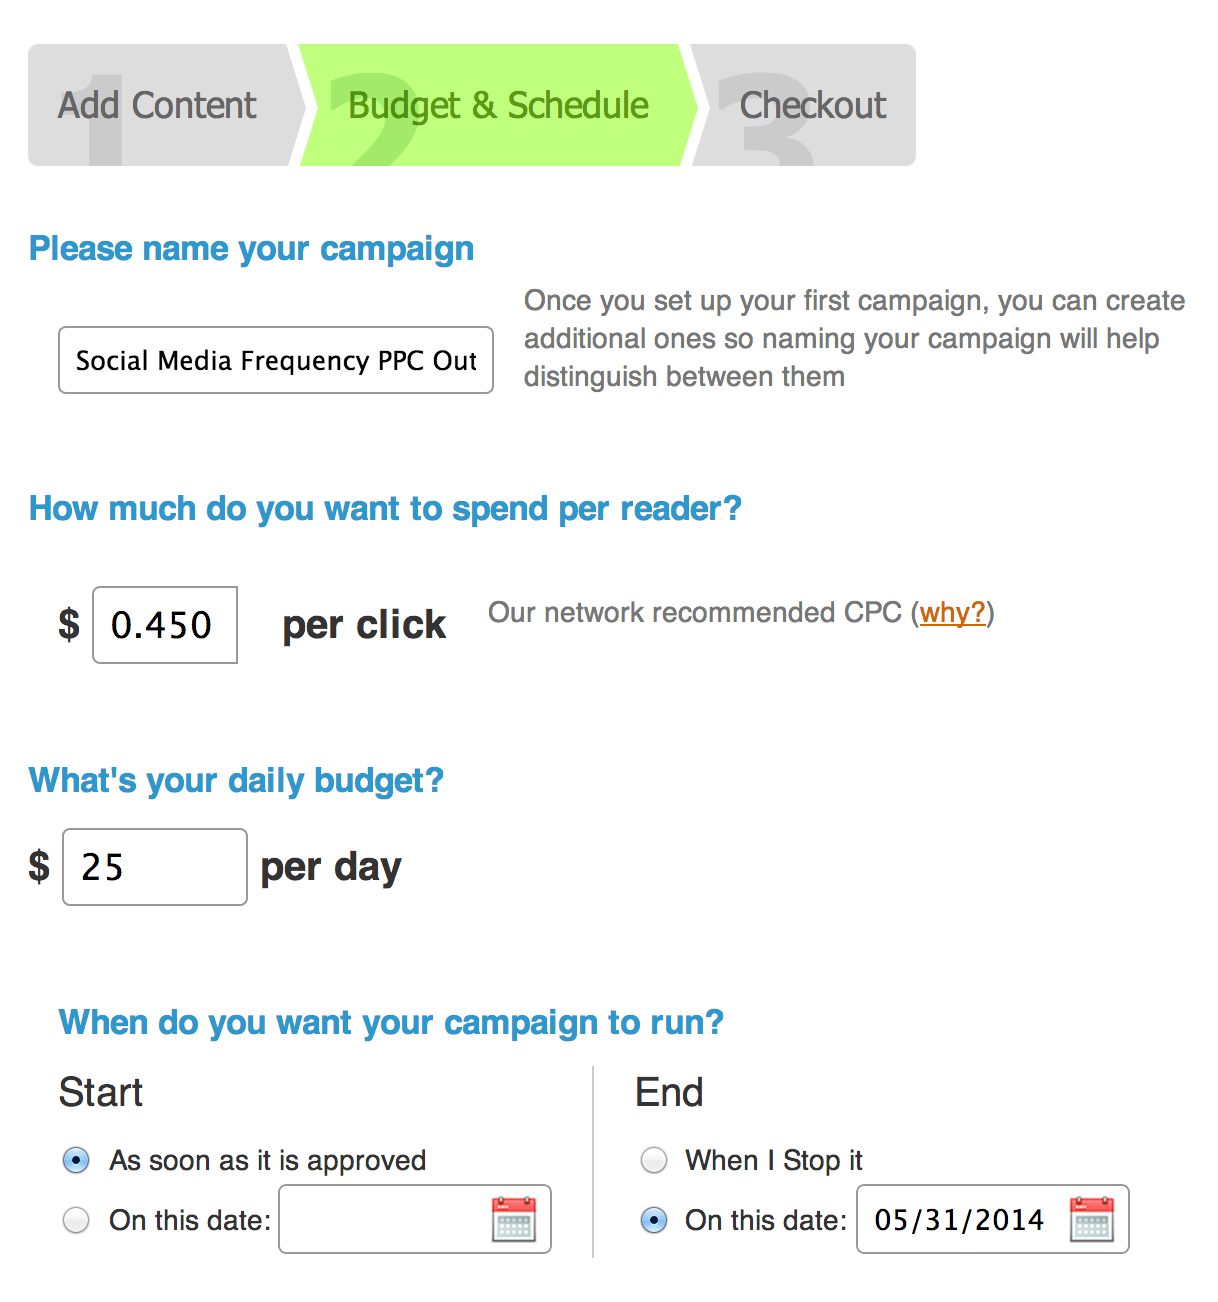
To get set up, create a free account at Outbrain, and head over to their Amplify Your Content section (also labeled as “Acquire Traffic”). You can submit the links you want to share and set the price-per-click and run dates for your campaign.
Difficulty: Hard
Time: 1 day
21. Contact sources and influencers directly
To help your content spread even further, you can enlist the help of those who helped make your blog post great in the first place. Let your sources know they helped in creating your content. In his article at KISSmetrics, Aaron Agius offers a handful of nifty ways to get in touch with the sources and influencers directly related to your post:
- Email them directly
- Direct-message them on LinkedIn
- @-mention the sources when you share your article on Twitter
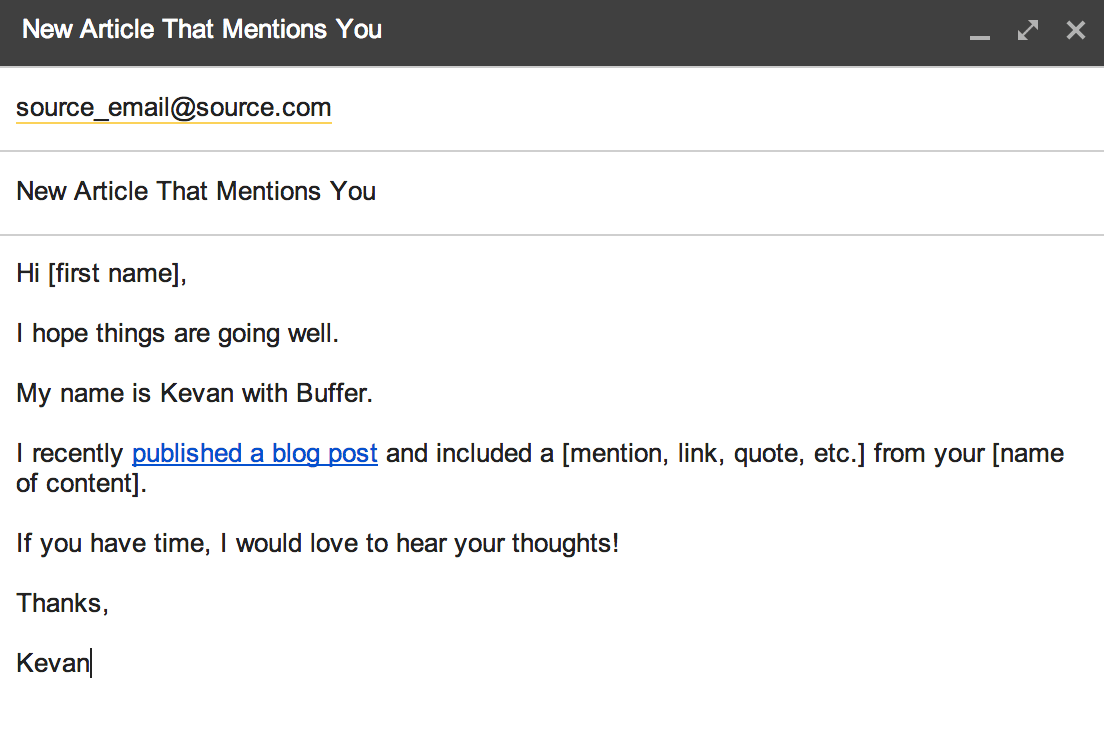
Agius even provides an email template for the outreach. Here’s what it looks like with a couple customizations for my Buffer article:
If you’re not sure where to find contact information for your source, here are a couple places to look.
- The footer of the blog
- Do a Ctrl+F or Cmd+F search on the site for the word “about” or “contact”
- Seek out the source on Facebook, LinkedIn, or Twitter, and see if they post additional contact info there
Difficulty: Moderate
Time: 1 hour (give or take, depending on how many sources you have)
The best way to spend 30 minutes repurposing an original article
Can you do every single one of these tips for each article you write? It’s unlikely. It would take a small army to both churn out amazing content and to repurpose and reuse it in all 21 of these ways.
So let’s say you have 30 extra minutes to devote to extending the value of your original article. Here’s how I would spend it.
- 5 minutes to repost and schedule the original story two to three times to Twitter, Facebook, LinkedIn, and Google+
- 5 minutes to create snippets for sharing later
- 5 minutes to share to a content community
- 15 minutes to post to Quora, LinkedIn, or Medium

Now I’d love to turn it over to you. What tips do you have for getting more from a single piece of content? What has worked in the past? What are you itching to try in the future? It’d be awesome to hear your thoughts in the comments.
P.S. If you liked this post, you might also like The Ultimate Guide to Repurposing Content: 12 Ways to Extend the Life of Every Article You Write and The Complete List of Evergreen Content Ideas for Your Blog. Why not sign up for posts via email? You’ll never miss a thing.
P.S. If you liked this post, you might enjoy our Buffer Blog newsletter. Receive each new post delivered right to your inbox, plus our can’t-miss weekly email of the Internet’s best reads. Sign up here.
Image credits: tk-link, Business 2 Community, One Frugal Chick.
Try Buffer for free
190,000+ creators, small businesses, and marketers use Buffer to grow their audiences every month.


