When you find yourself using a product or tool on a daily basis, you get to know the tool inside and out, including all the helpful shortcuts and little-known features.
We’d love to share our Buffer secrets with you.
Here are some of our personal favorite Buffer features that might have flown under your radar. Enjoy!

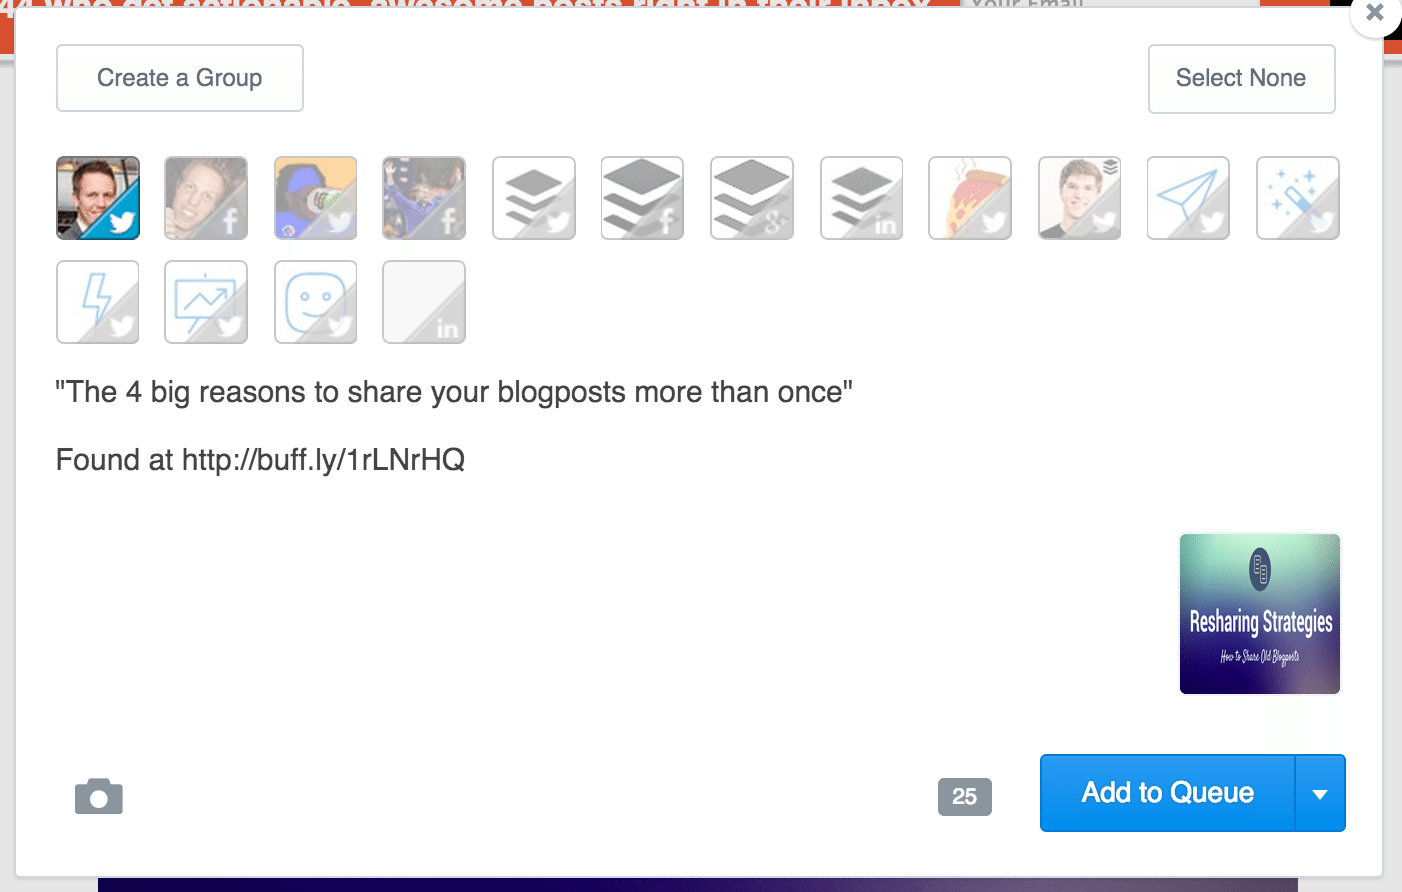
1. Share to multiple profiles in one click with Groups
Imagine you’ve got an update to share with your Twitter, Facebook, and Google+ followers. Imagine you typically share the same update to these same social circles multiple times per day.
Groups to the rescue!
You can create a custom collection of grouped profiles so that when it comes time to share an update, you can share in one-click to the group you’ve created.
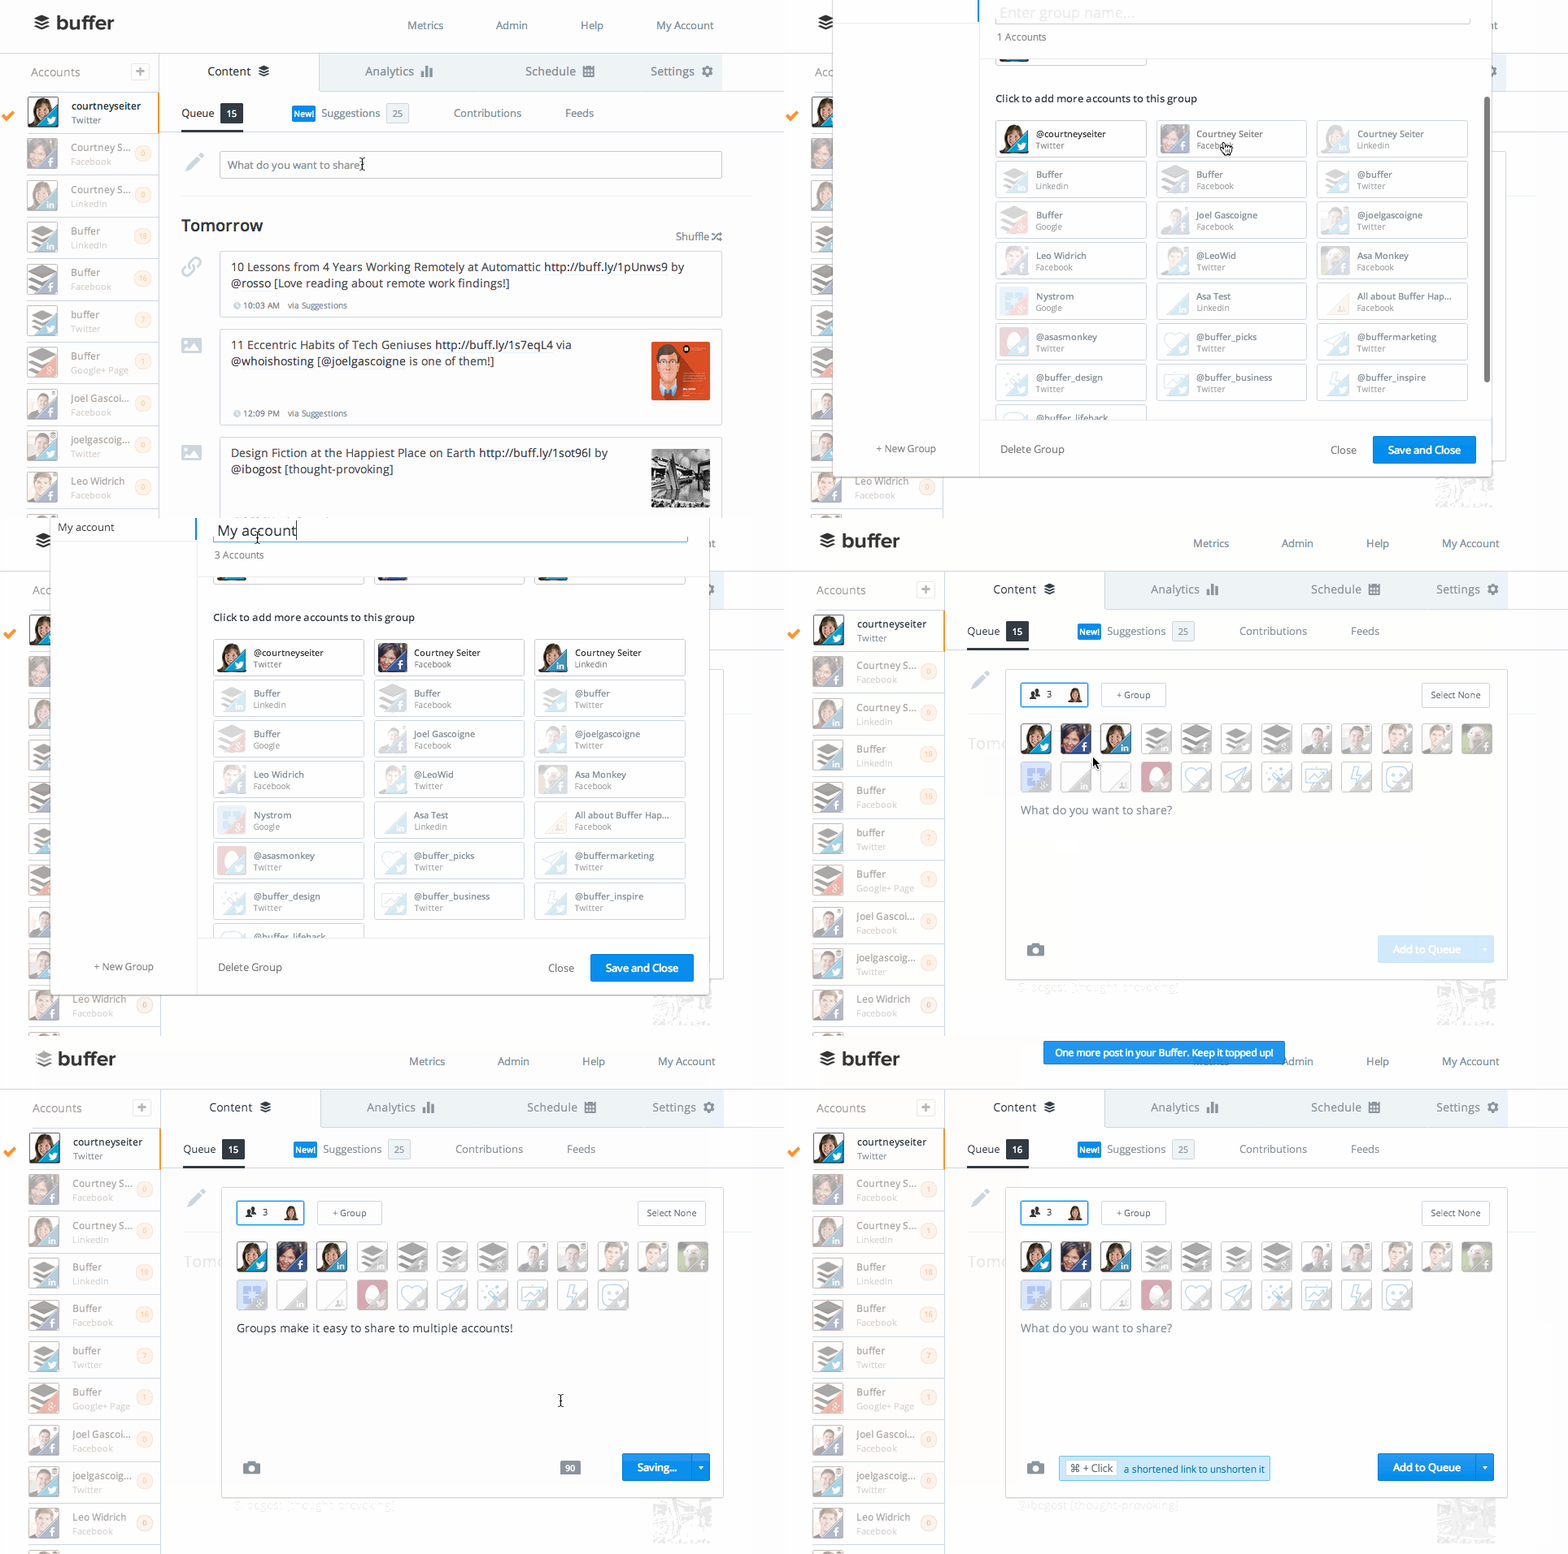
Groups are available for our Buffer for Business users. Not a Buffer for Business user? You can try out this tool for a full week for free, and then decide if it’s a fit with your workflow.
2. Re-buffer your top updates from your analytics page
Via both the standard analytics and the expanded business analytics inside your Buffer dashboard, you can drag-and-drop or one-click-add to your buffer those posts that were smash hits the first time around.

Here’s a pro tip: In the advanced business analytics, sort your posts by clicks, then click-and-drag the top performers to share again!
3. Buffer retweets direct from Twitter
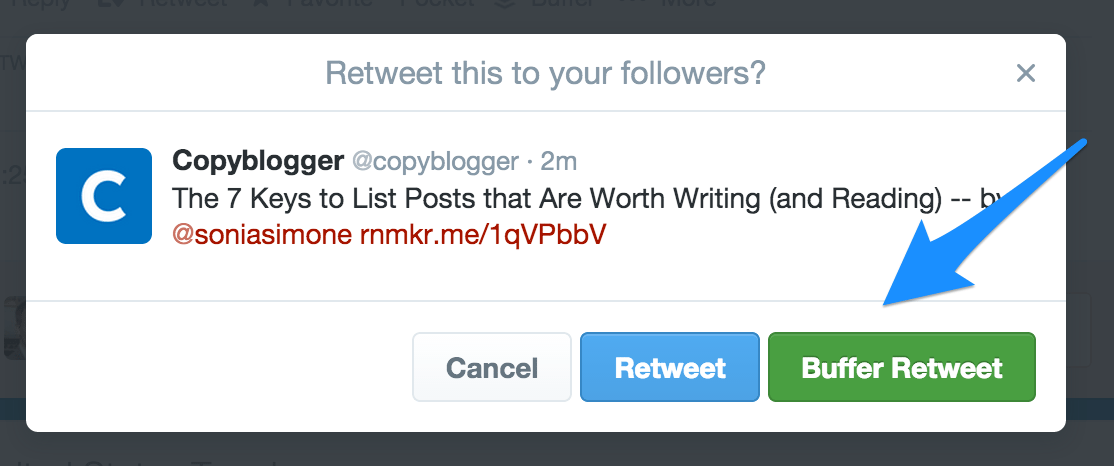
Having the Buffer browser extension installed is like having a superhero in your backpocket. One of your new superpowers is to Buffer retweets directly from Twitter. When you click the Retweet button, you get the choice of adding the retweet to your queue either directly or as a quote. Super!
4. Enhance your schedule with a third-party tool
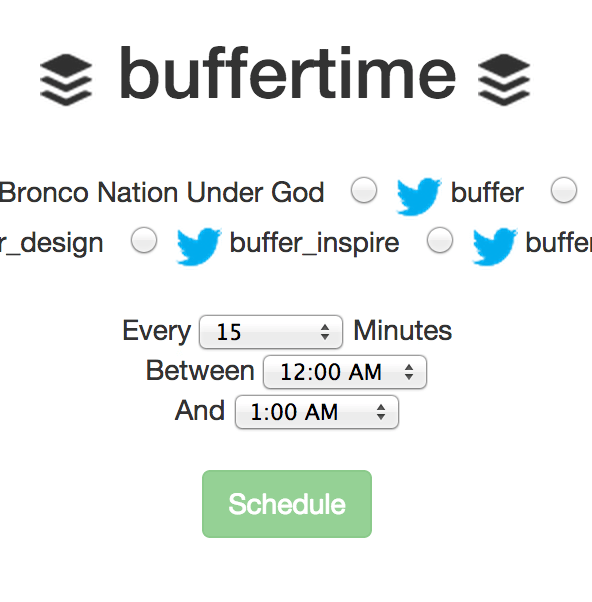
We’ve loved using Followerwonk to discover the best time to tweet. And many of us take scheduling one step further with Buffertime, a third-party app for simple scheduling.
Tell Buffertime you’d like to post every X minutes beginning at X and ending at X, and Buffertime will make it so!
5. An extra level of security with two-step authentication
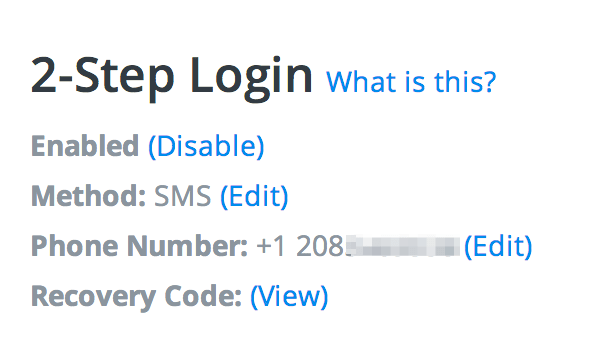
Keep your buffers secure by signing up for two-step authentication, requiring a text-message code to be entered each time you log in from somewhere new.
Click on the My Account link in the very top right corner of your Buffer web dashboard. Then click on Access & Password
You can edit the settings for how you manage your two-step login (via SMS or via Google Authenticator), choose which phone number should be used, and view the one-time recovery code (in case you ever lose your phone).
6. Little-known browser extension magic
You can Buffer any webpage to any of your connected profiles with the click of the Buffer browser extension button. In seconds, any page and any image can be added to your queue to share on schedule.
To get even more powerful, you can try these advanced browser extension tips:
- Access the Buffer extension with a custom keyboard shortcut. Alt+B is the default. You can edit it to your liking from inside the extension options.
- Select any text on the page, click the browser extension, and your selected text will be automatically prepopulated into your update.
- Right-click on any image on a webpage to Buffer the image directly.
- Combine the above two tips. Select any text on the page, then right-click an image. You can share the image alongside the text you’ve chosen!
7. Share on-the-go and over email with a secret address
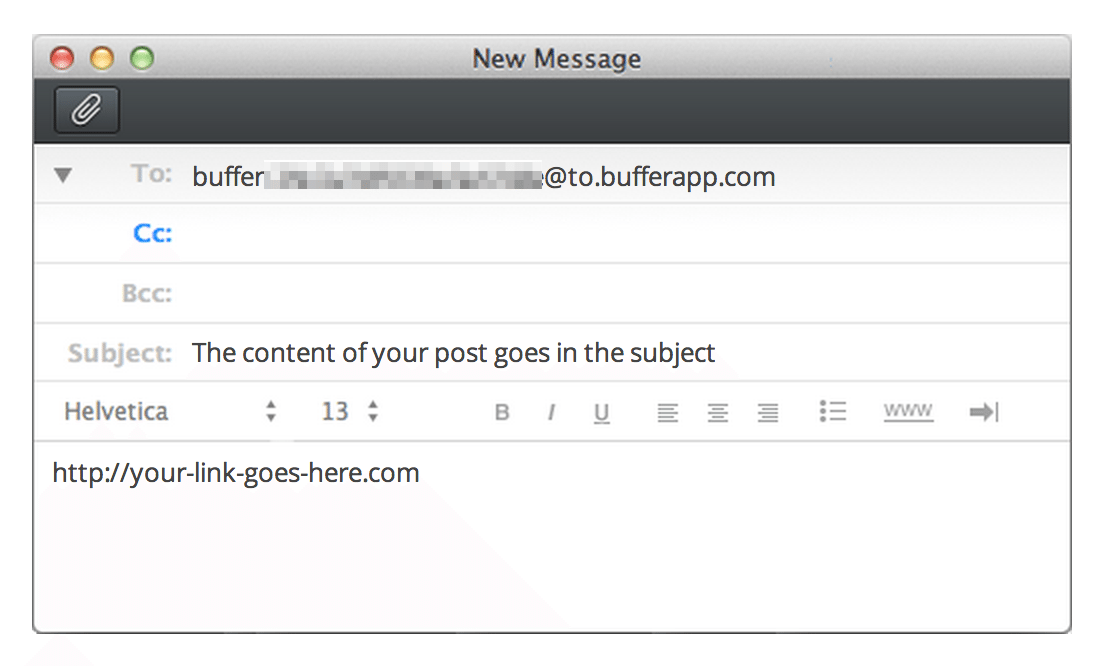
Among your Buffer goodie bag is a custom email address, just for you.
Click your email settings inside your account to view your secret address. Go to My Account > Email Settings, then scroll down to the “Buffer by email” setting.
Click on the “secret email” link to view your custom email address. Then, add to your queue by sending an email with the content of the update in the subject and the update link in the body.
8. Connect a new (or custom) link shortener
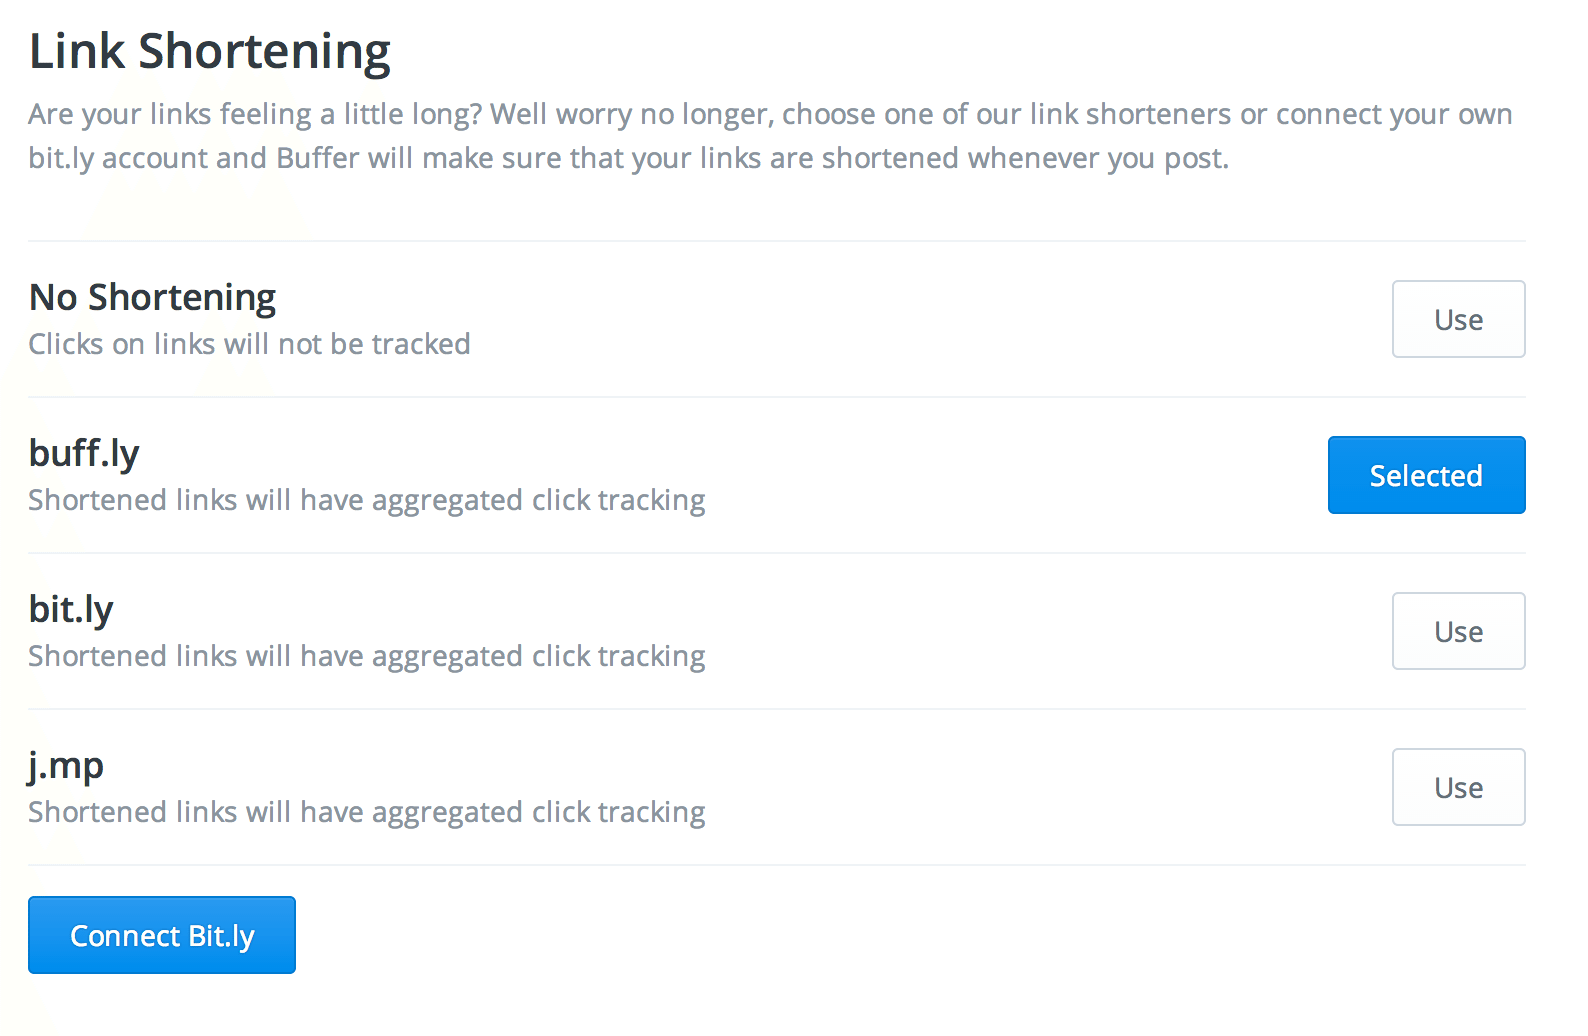
You can control which shortening service Buffer uses to shorten links.
If you prefer bit.ly links over buff.ly links, you can change this via your Settings tab on your dashboard. Go to Settings > Link Shortening.
Even a custom short URL is possible.
Or, if you’d prefer no shortening with your links, opt out on your link shortening settings page.
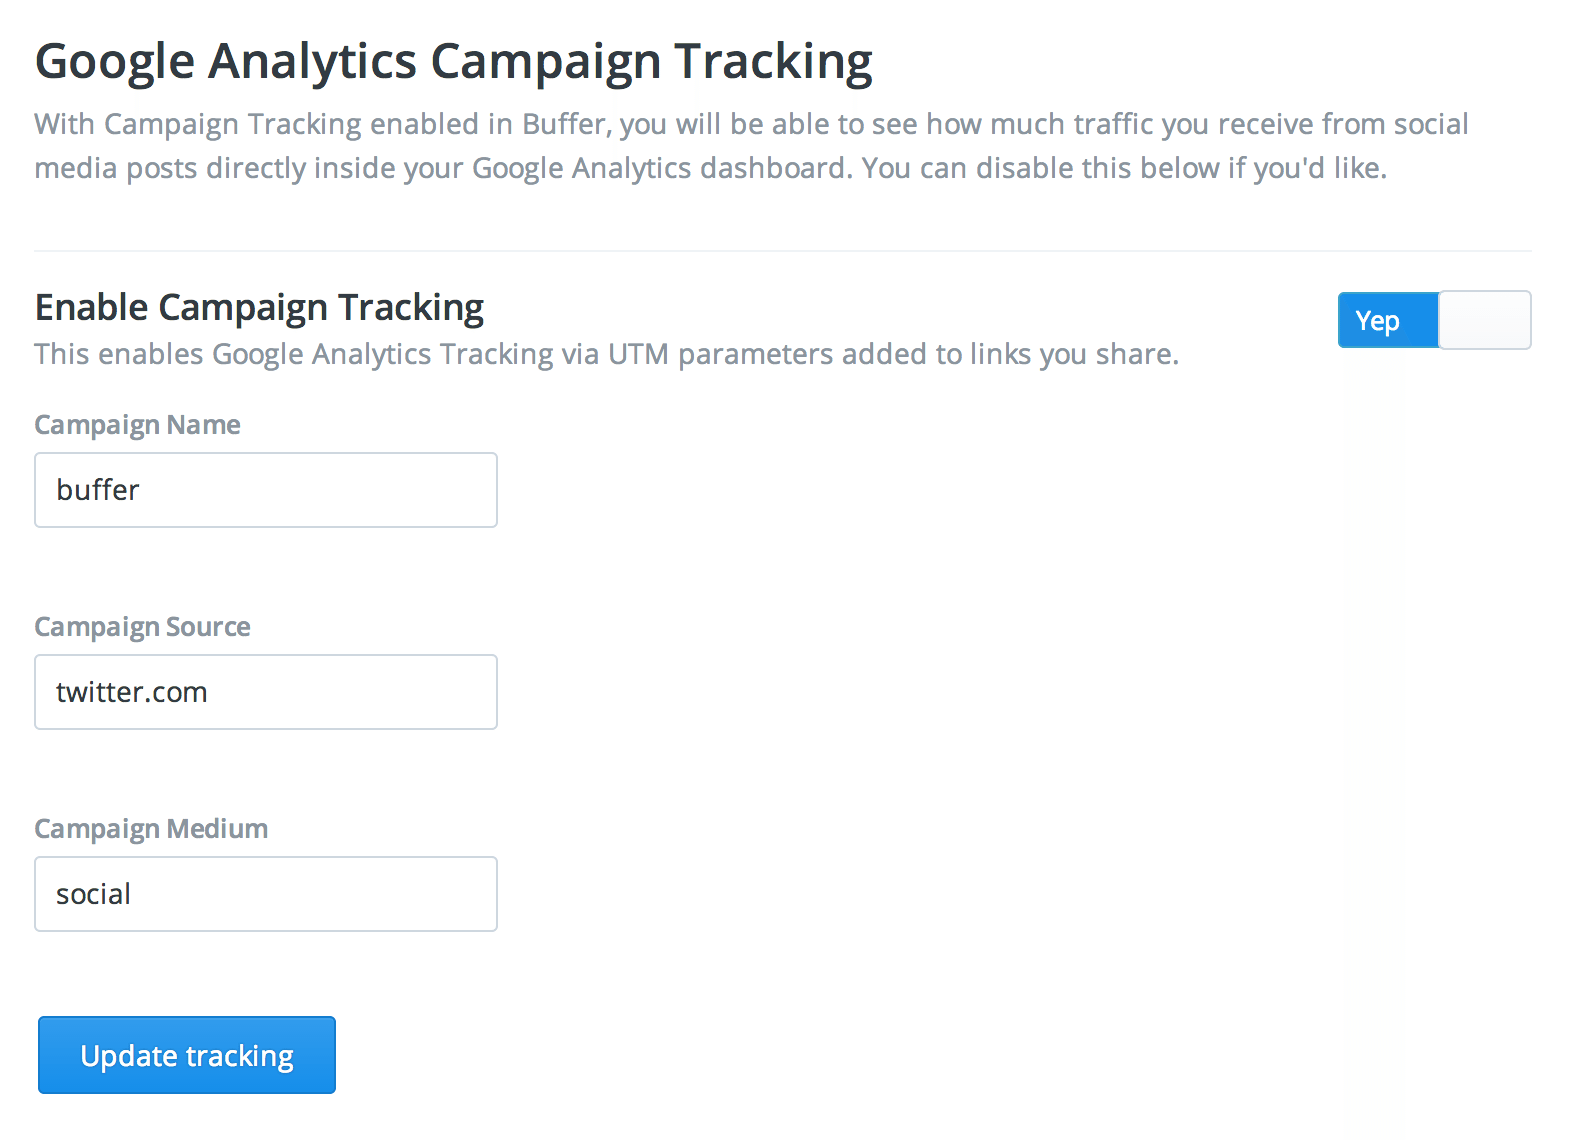
Bonus tip! Buffer’s link shortening services include integration with Google Analytics and campaign tracking.
When you enable the campaign tracking feature (it’s turned on for you by default), you can follow up on the traffic you receive from your social media posts by checking the data in Google Analytics. For instance, when I add this link to my Buffer queue:
https://buffer.com/resources/facebook-tools
It will be shared like this:
https://buffer.com/resources/facebook-tools?utm_content=buffer4f8bd&utm_medium=social&utm_source=twitter.com&utm_campaign=buffer
Further, you can customize the specific utm parameters for your links. It all happens within the link shortening section of your Buffer settings.
9. Reorder your profiles any which way you want
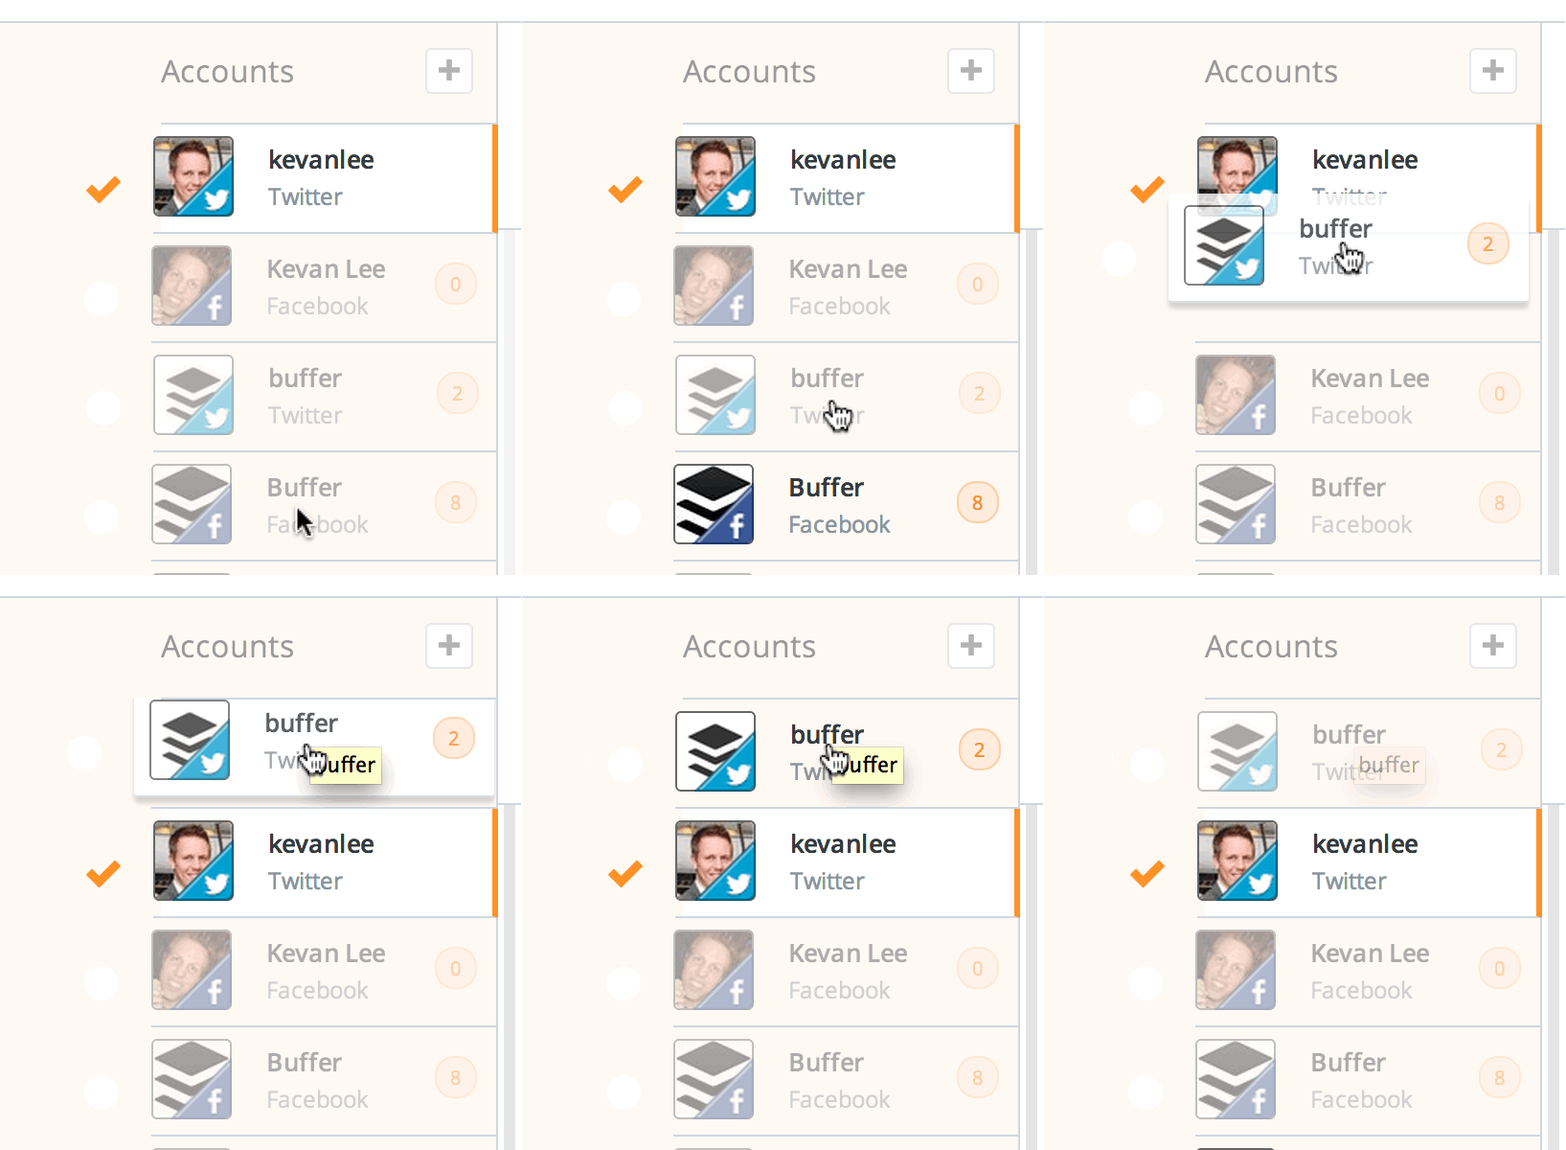
Click and drag the position of your profiles from within your dashboard. (One of my favorite tips!)
If you’d prefer your Twitter always on top, make it so! Your lineup can be independent of the order in which you connected. Drag-and-drop into place, however makes things most efficient for you!
10. Invite contributors to share with you
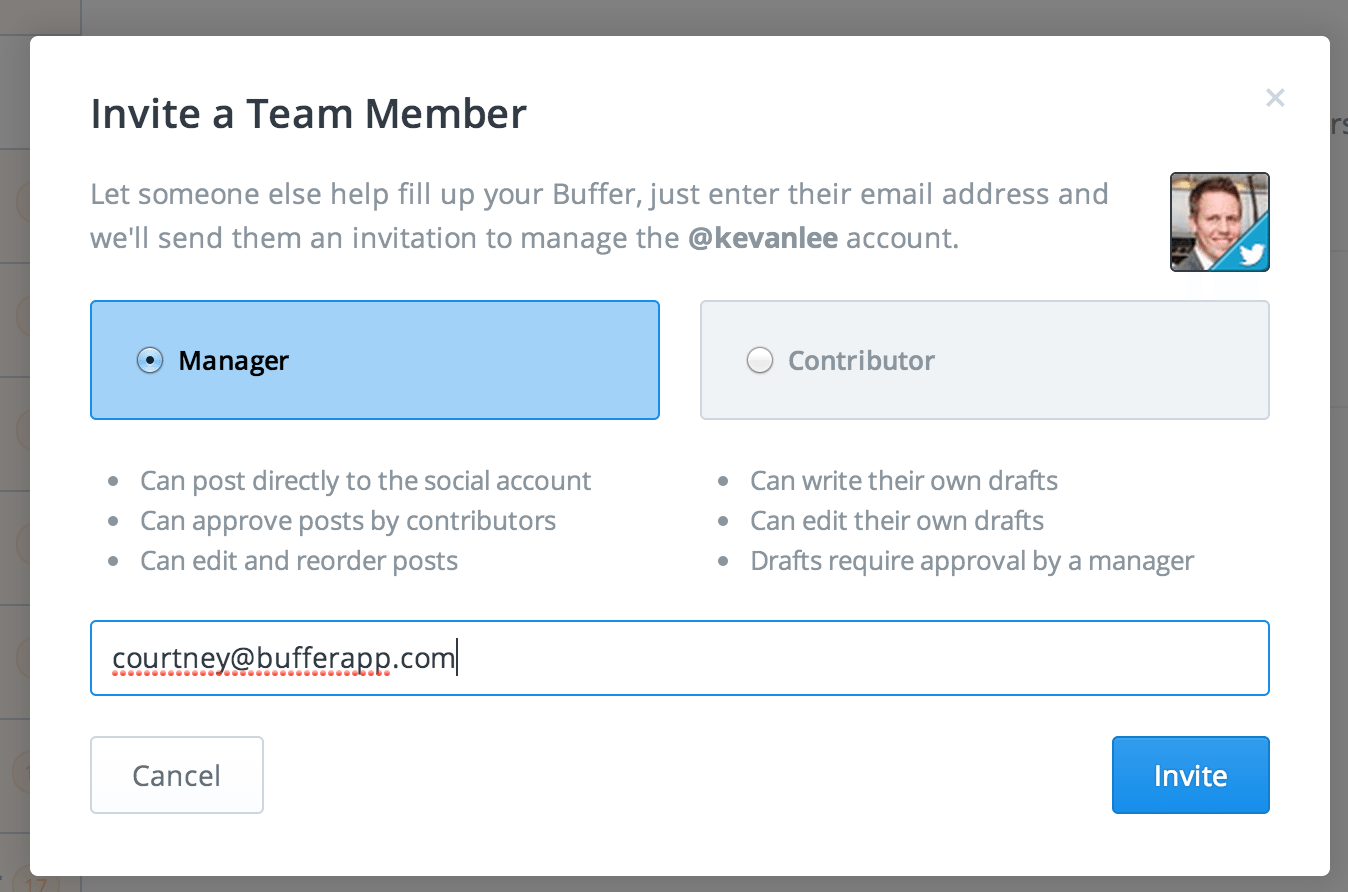
Say you’ve got a marketing team on hand or you know a great group of connections who always find stellar content. The Buffer for Business plan has a built-in option for these collaborators to contribute straight to your profiles.
Invite new people to contribute to your account—even go as far as to appoint managers vs. contributors—and you can then approve and add their submissions directly to your feed.
Managers have the following permissions:
- Can post directly to your social account
- Can approve posts from contributors
- Can edit and reorder posts
Contributors can:
- Write/edit their own drafts
- Final approval to be added to the queue must come from a manager
Approving contributions is as easy as clicking a button! Here’s a quick example:
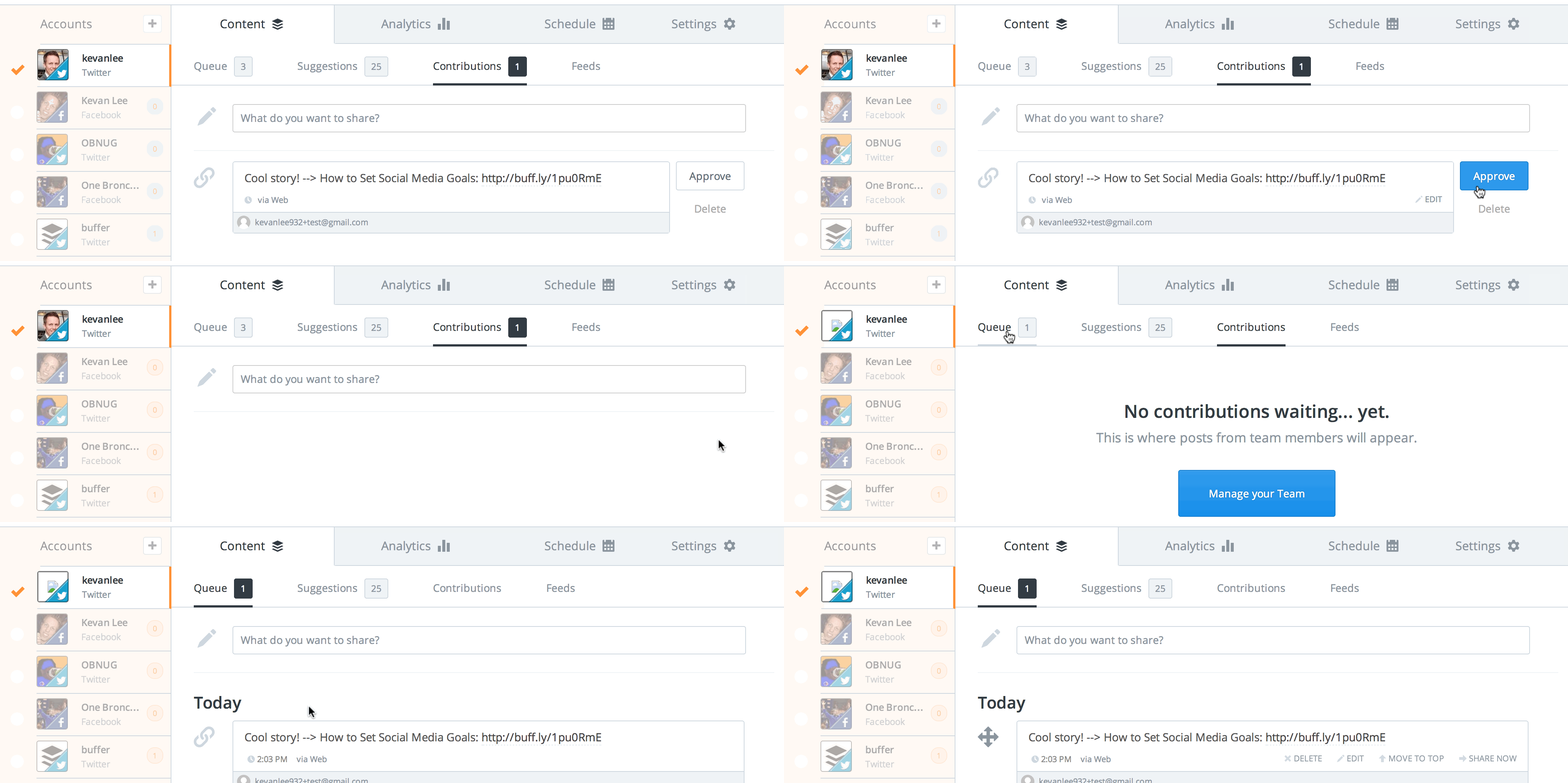
Business users can find these options super quickly by clicking on the “Contributions” heading from inside the content dashboard (between the “Suggestions” and “Feeds” headings).
Your turn: Which little-known Buffer features do you use most?
I’d love to hear from you! Which little-known Buffer features have made an impact on your social media sharing? What are your go-to moves on Buffer?
Feel free to add your thoughts in the comments of this post, and let me know if I can add any more detail or directions to what we’ve shared here already!
Happy sharing!
One more thing: Some of these awesome features can be sampled with a free trial of Buffer for Business! Click the button below if you’re interested in a zero-cost, no-risk tryout.

Image sources: Gilad Fried, Blurgrounds, Death to the Stock Photo
Try Buffer for free
190,000+ creators, small businesses, and marketers use Buffer to grow their audiences every month.


