
The advice is everywhere: repurpose your content! Get more mileage out of your blog by turning it into social posts! Turn your LinkedIn posts into several tweets!
But this advice lacks the logistical aspect: how can you keep track of something you published today and repurpose it over the next few weeks?
As a freelance content marketer and journalist, my online presence is critical. I would expend far too much brain energy if I wrote every single social post from scratch. Instead, I’ve found a way to use automation to build out reminders to repurpose my calendar.
My efforts have paid off. I’ve tripled my online following (to 4,500 followers on LinkedIn) in 18 months, and most of my work is inbound. I schedule two posts for LinkedIn per day and very, very few posts are net new content. Most are a repurpose of something I’ve written elsewhere.
Whether you’re a team of one or a team of twenty, it’s the same scenario: you’ve got to bake a repurposing plan into your process. And automation can take the “thinking” out of the process. Here’s how.
Step 1: Start with your original content
At the center of your content repurposing will be your original content: blog, eBooks, webinars, podcasts, and social posts.
Automation works best when you’re going from long-form content to short-form content, or from one social platform to another. Because in these cases, you’re not thinking of something new: you’re taking the work you’ve already done and prepping it for a new platform.
You can try the reverse (like starting with a Twitter thread and using automation to remind you to create a full-blown blog post), but the beauty of automation is adding a date that you plan to re-share the content. That’s harder to do when you need to spin up an entire article — who knows how busy you’ll be that day.
To prep for automation, you need to determine where your content “lives” — such as your blog, an email platform for newsletters, a longer LinkedIn post that you may want to repurpose into a shorter tweet, and other content you create.
Eventually, you can think about repurposing your repurposing (and sharing your repurposed content a second time), but it’s easiest to have your brand new content as a starting point.
Step 2: Create your content repurposing plan
You can’t start down the path of automation without knowing what the end result will be. If you already have a content repurposing plan, great! Adding automation will be easy.
Your plan should include your starting piece of content and the end result. You’ll need to think about:
- Format (creating a social post, sharing a link)
- Volume (turning one blog post into three social posts)
- Cadence (how often you’ll share something you’ve repurposed)
- Platform (where will you publish the repurposed content)
When I first started repurposing, I got out a giant calendar (ok, it might have been Airtable because I’m a geek like that) and “drew out” my plan. I started with an article that I published on Medium and a hypothetical publish date of the first Monday of the month. I would share the link the next day on my social platforms. Then I would plan to create LinkedIn posts based on ideas in the article and share them three weeks and six weeks after the initial publication date.
I filled in my calendar. Eventually, I could visualize all of the days throughout the month when I’d have repurposed content to share (and, conversely, the days I’d need to create new content). I can maintain a high volume of social posts because I do so much repurposing, and the effort is much lower than new content.
Once I had a plan, I was ready to create automation.
Step 3: Choose a content repurposing destination
When you automate your content repurposing, you’re making a “checklist” that you’ll work from. As you schedule upcoming content, you’ll work from the checklist, whether it’s a project management tool, a to-do app, or a spreadsheet.
What does this look like IRL? I plan all of my upcoming content (both new and repurposed) in Trello. When I publish something new, automation adds a new reminder in Trello (called cards) for me to repurpose that content on a specific date in the future. I can work from either a list view or a calendar view.
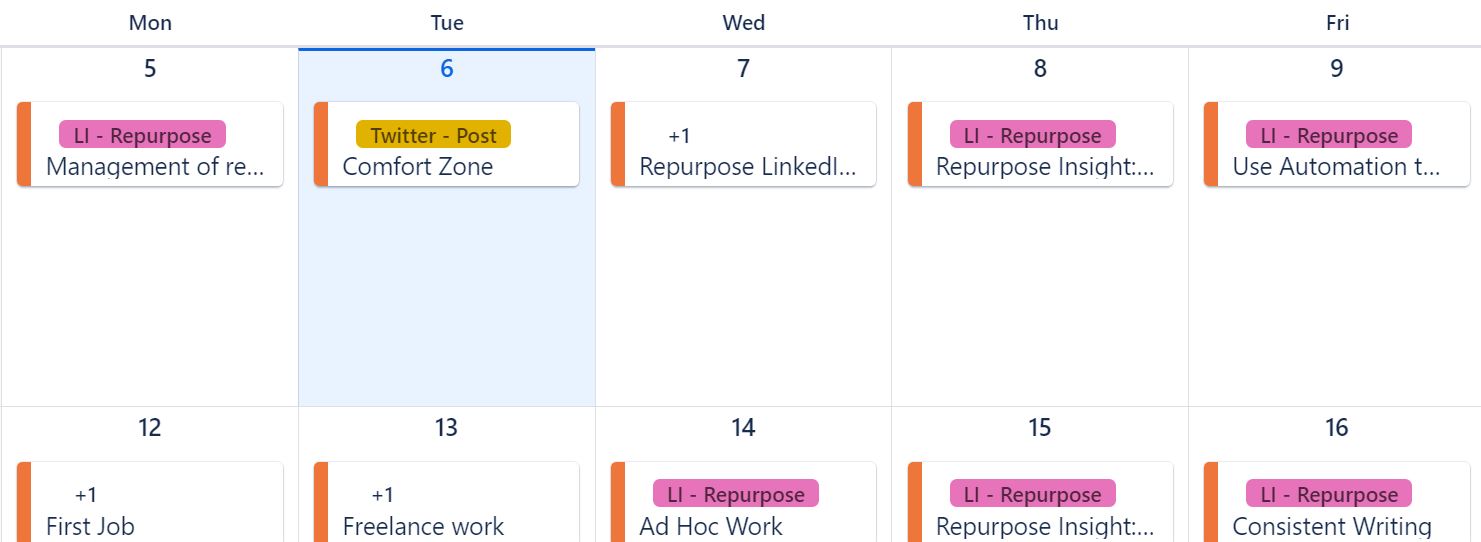
However you’re planning your content today, you can use the same tool or app with automation. I add labels in Trello to identify if the content is new versus repurposed.
If you start adding automated reminders or to-do items to your existing project management tool, it might look overwhelming — especially if you’re not planning your repurposed content today.
You should create separate views or filters within your tool to separate your new content from your repurposed content. You may also want to organize your repurposed content by platform — either the original source or the final destination.
Step 4: Set up your automation
Automation tools connect two separate apps together. The original source of your content is the first app and your project management tool or spreadsheet for content planning is the second app. Most automation tools work in the same way: if <something> happens, then <something else> will happen.
For example:
- If a new article is published
- Then create a reminder in Trello to repurpose the content as a LinkedIn post in 3 weeks
Or:
- If a new post is scheduled in Buffer for my LinkedIn profile
- Then create a reminder in Trello to repurpose the content as a Tweet in 2 weeks
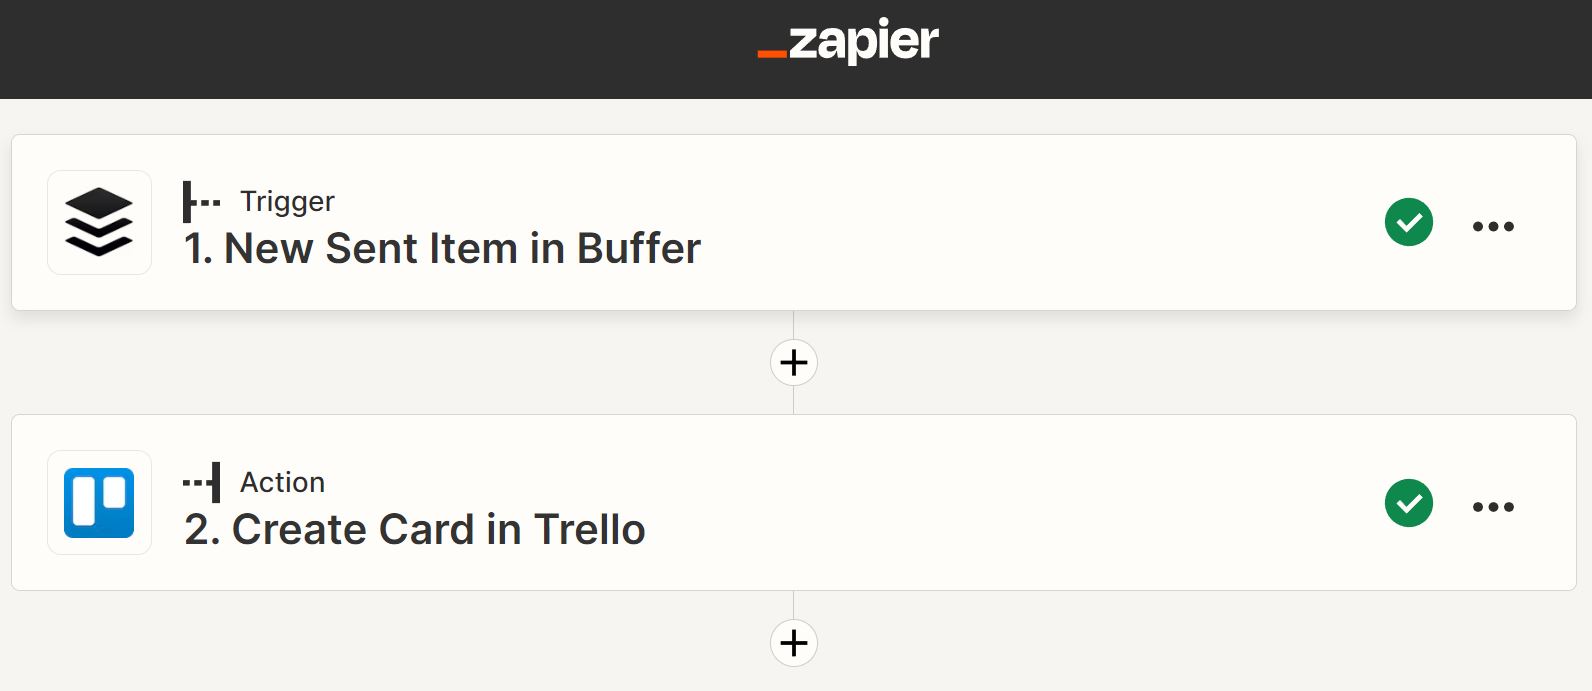
I use Zapier, but other tools include Make and IFFTT. The Zapier setup includes a Trigger (“this happens”) and then an action (“something else happens”).
Automation tools can handle more than one “then” action. Most of mine have several steps, such as repurposing the content into multiple social posts, on different platforms, and re-share the article six months later. One of my more sophisticated content repurposing automation has five actions.For every article published on Medium, cards are added to Trello to remind me of the following:
- Create a social post on LinkedIn in three weeks
- Create a social post on LinkedIn in six weeks
- Create a thread on Twitter in eight weeks
- Share the article in my newsletter (without a specific due date)
- Tweet a link to the article in six months
You can also use filters in automation tools to take different actions from the same source. When I schedule a holiday-specific post in Buffer, I don’t want to repurpose it later. I add a tag in Buffer called “Holiday” and filter those out in Zapier.
When you set up automation, you want the destination to contain as much information as possible, such as a link to the original content or the full text of the content (like the original social post). That way, when you work on creating your repurposed content, the original is right at your fingertips.
Step 5: Work from your content calendar
Automation will only create reminders for you to repurpose content in the future: you’ll still need to write the repurposed content from the original. As AI writing technology is rapidly developing, I’ve played around with tossing entire articles I’ve written into ChatGPT and asked it to condense the key ideas into a LinkedIn post. The output needs to be tweaked (a lot), but it’s a starting point.
Zapier has integration with GPT-3, so it’s possible to include AI as a step in your automation with an instruction to “Repurpose text from X source into a Twitter thread” with some instructions about the output. You can write the output directly to your destination so when you are ready to schedule the repurposed content, some ideas are waiting for you.
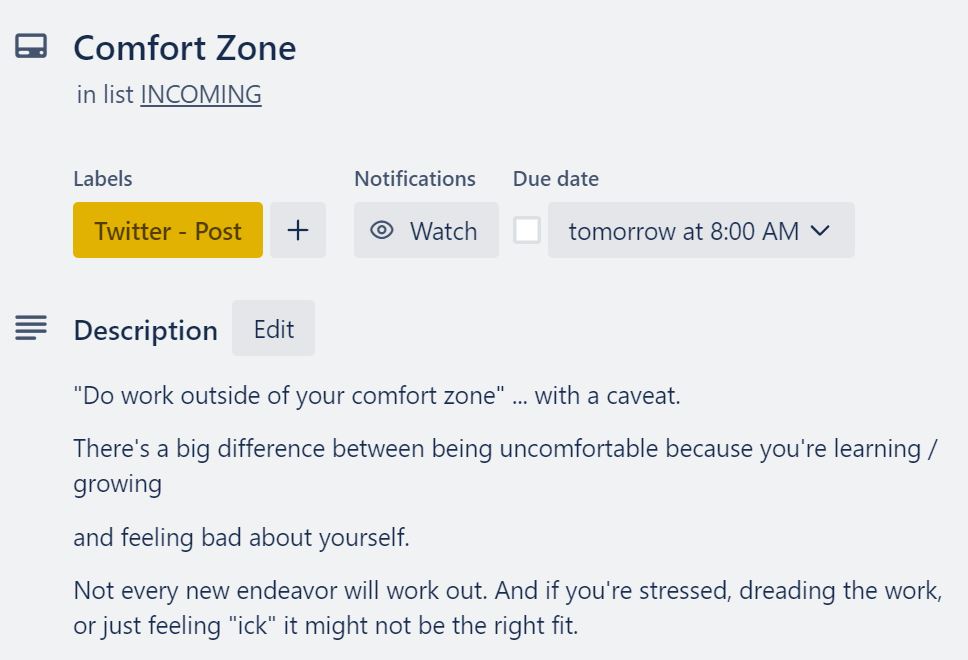
In my workflow, I’ll open Trello and look at the upcoming repurposed content I need to schedule. Each Trello card shows me the channel for the repurposed content, the due date, and the text of or a link to my original content.
This started as a LinkedIn post scheduled in Buffer. The text of the Buffer item was copied over to my Trello card. I can see by the Label that I need to create a Twitter post from this content, due tomorrow.
I’ll write my repurposed social posts in Buffer and schedule them according to the date in Trello. I do this work in bulk, usually scheduling about two weeks’ worth of repurposed content in one sitting.
The benefit of waiting until the repurposed content comes due in Trello is that I’m looking at the original with fresh eyes (weeks or months later). I’ll pull out whatever insight makes the most sense at a time to create my repurposed post. But another alternative would be to write the repurposed content immediately after it arrives in your destination, while the original content is still fresh in your mind. Then you’re only scheduling the repurposed content later; you’re not writing and scheduling.
Some pro tips for managing content automation
I’m a one-person repurposing machine, so I have a lot of automation set up!
Here are some other things I do:
- Export my LinkedIn comments once a month and import them into Zapier to create Trello cards to repurpose my comments as a new LinkedIn post.
- Whenever I speak on a panel, I add a link to the recording in Airtable. The new Airtable record triggers Trello to review the recording and create social posts from what I said on the panel.
- I participate in a lot of Slack communities. I save some of my own comments in Slack and those are the trigger to repurpose the comment as a social post (or even sometimes expand on the idea as a full article).
Let content repurposing become a flywheel
When I first added repurposing automation to my workflow, I added too much. Since I manage all of my own work, I had wayyyy too many steps, and I couldn’t keep up with the repurposed content I needed to write. Maybe a larger content team would be able to handle my grand plans, but as a solo person, I was overwhelmed. So I scaled back and started with creating one social post for each article I wrote. Once I had a handle on that, I added more and more automation.
But now I’ve built momentum. I repurpose my repurposed content. It’s created a flywheel effect and I get so much more content with far less effort.
I never have to think about how I’ll maintain my online presence, because every time I sit down to schedule my repurposed content, I know exactly what I need to write.
Try Buffer for free
200,000+ creators, small businesses, and marketers use Buffer to grow their audiences every month.