How To Add The Pinterest Pin It Button To Your Blog And Let People Pin Posts With Pictures
Oh yes, it really seems as if Pinterest is going to take over the Social Media world, with all the recent craze that has been created around it. Every 60 seconds, there are over 1000 new visitors, which are flooding the service, revealed a recent infographic.
And frankly, I can’t blame anyone for it. The beautiful boards and new approach to a newsstream, just makes it incredibly easy to browse through the different collections for ages.
With the “Pin it” button, websites also have a great opportunity to get more exposure from Pinterest very easily. One of the issues, that a lot of people have identified, is that it doesn’t work well for choosing any picture off your page that also goes through to Pinterest.
Now, Douglas Karr from MarketingTechBlog wrote a great post on adding a Pinterest Pinit Button to WordPress. He explained exactly how it works by adding a code snippet to your blog that will then pull in a featured image.
Of course, if you are like me, and not too savvy touching code, I thought of finding an alternative solution for you. So here you go:
1.) Install Digg Digg and enable the Pin It Button
As the first step to allow your readers to also pick images, just install the wordpress sharing plugin Digg Digg. You can see it in action on the lefthand side here.
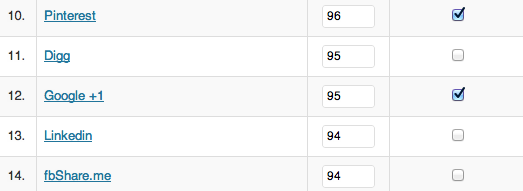
Now, head to your “floating bar settings” area and find the Pinterest button. Click enable and set the weighting so it comes up where you want it to show:
2.) Allow your readers to pick pictures
Now, of course, since Pinterest is all about pictures and great visualisations, there is no point in having the button if you readers can’t also post a picture with it.
It is very easy to get a picture to come up for your readers though. All you have to do is upload a picture and set it as “featured image” inside your WordPress dashboard. Once your picture is uploaded, right next to “insert into post” there should be a “use as featured image”.
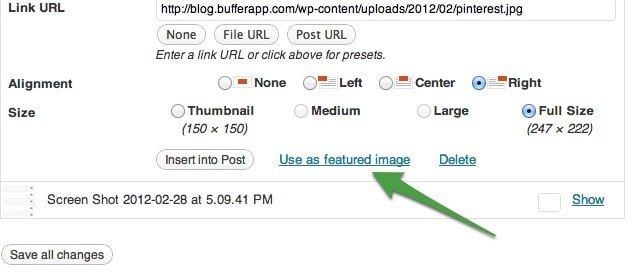
On the bottom right of your wordpress editor, you will be able to easily set a new featured image or remove the one you have selected:

Of course, you have to be careful to also use an excerpt mode for your blog if you start to use this. Otherwise, you could end up with two pictures on your landing page.
Now, whenever your readers decide to pin your articles, they can also conveniently post a picture with it to their boards:
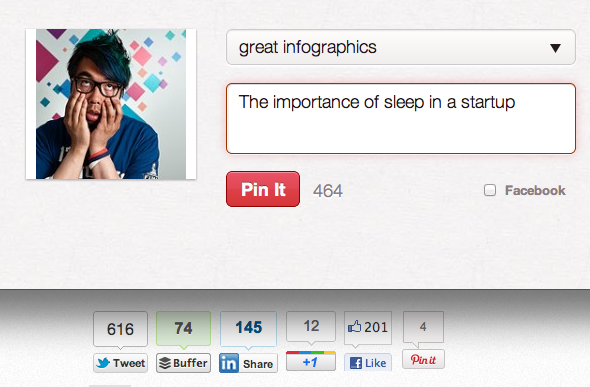
And that’s it. Of course, don’t forget to set a featured image on each of your articles, so each post is “pinable” for your readers.
Ok, I hope the tutorial is useful to get your blog all set up for being easy to pin. Have you started to pin lots of articles yet?
UPDATE: To get a featured image for each of your posts more easily, just install a WordPress plugin called Auto Featured Image. Thanks a lot to Edmundo, pointing it out in the comments.
Try Buffer for free
180,000+ creators, small businesses, and marketers use Buffer to grow their audiences every month.
Related Articles

I’ve put dozens of AI writing tools to the test — here's a deep dive into my favorite AI writing generators and who I think they’ll be most useful for.

I've tried 57 productivity tools in the past year. These are the ones I keep coming back to.

Save time, automate processes, get in-depth analytics, and more with these best-in-class social media tools for 2025.